Command-line tools (CLI)
The list of the commands (CLI) you can use to manage CloudLinux OS components.
- CageFS
- LVE-stats 2
- MySQL Governor
- PHP Selector
- Python Selector
- Ruby Selector
- Node.js Selector
- Apache mod_lsapi PRO
- Website monitoring tool and Slow Site analyzer
- X-Ray Autotracing
- Other CLI tools
CageFS
cagefsctl is used to manage CageFS. It allows initializing and updating CageFS, as well as enabling/disabling CageFS for individual users.
Use the following syntax to manage CageFS: /usr/sbin/cagefsctl [OPTIONS]
Options:
| -i | --init | initialize CageFS (create CageFS if it does not exist) |
| -r | --reinit | reinitialize CageFS (make backup and recreate CageFS) |
| -u | --update | update files in CageFS (add new and modified files to CageFS, remove unneeded files) |
| -f | --force | recreate CageFS (do not make backup, overwrite existing files) |
| -d | --dont-clean | do not delete any files from skeleton (use with --update option) |
| -k | --hardlink | use hardlinks if possible |
| --create-mp | Creates /etc/cagefs/cagefs.mp file | |
| --mount-skel | mount CageFS skeleton directory | |
| --unmount-skel | unmount CageFS skeleton directory | |
| --remove-all | disable CageFS, remove templates and /var/cagefs directory | |
| --sanity-check | perform basic self-diagnistics of common cagefs-related issues (mostly useful for support) | |
| --addrpm | add rpm-packages in CageFS (run cagefsctl --update in order to apply changes) | |
| --delrpm | remove rpm-packages from CageFS (run cagefsctl --update in order to apply changes) | |
| --list-rpm | list rpm-packages that are installed in CageFS | |
| -e | --enter | enter into user's CageFS as root |
| --update-list | update specified files only (paths are read from stdin) | |
| --update-etc | update /etc directory of all or specified users | |
| --set-update-period | set min period of update of CageFS in days (default = 1 day) | |
| --force-update | force update of CageFS (ignore period of update) | |
| --force-update-etc | force update of /etc directories for users in CageFS | |
| --reconfigure-cagefs | configure CageFS integration with other software (control panels, database servers, etc) |
Use the following syntax to manage users:/usr/sbin/cagefsctl [OPTIONS] username [more usernames]
Options:
| -m | --remount | remount specified user(s) |
| -M | --remount-all | remount CageFS skeleton directory and all users (use this each time you have changed cagefs.mp file |
| -w | --unmount | unmount specified user(s) |
| ____ | --unmount-dir | unmount specified dir for all users |
| -W | --unmount-all | unmount CageFS skeleton directory and all users |
| -l | --list | list users that entered in CageFS |
| --list-logged-in | list users that entered in CageFS via SSH | |
| --enable | enable CageFS for the user | |
| --disable | disable CageFS for the user | |
| --enable-all | enable all users, except specified in /etc/cagefs/users.disabled | |
| --disable-all | disable all users, except specified in /etc/cagefs/users.enabled | |
| --display-user-mode | display the current mode ( "Enable All" or "Disable All" ) | |
| --toggle-mode | toggle mode saving current lists of users (lists of enabled and disabled users remain unchanged) | |
| --list-enabled | list enabled users | |
| --list-disabled | list disabled users | |
| --user-status | print status of specified user (enabled or disabled) | |
| --getprefix | display prefix for user |
PHP Selector related options:
| --setup-cl-selector | setup PHP Selector or register new alt-php versions |
| --remove-cls-selector | unregister alt-php versions, switch users to default php version when needed |
| --rebuild-alt-php-ini | rebuild alt_php.ini file for specified users (or all users if none specified) |
| --validate-alt-php-ini | same as --rebuild-alt-php-ini but also validates alt_php.ini options |
| --cl-selector-reset-versions | reset php version for specifed users to default (or all users if none specified) |
| --cl-selector-reset-modules | reset php modules (extensions) for specific users to defaults (or all users if none specified) |
| --create-virt-mp | create virtual mount points for the user |
| --create-virt-mp-all | create virtual mount points for all users |
| --remount-virtmp | create virtual mount points and remount user |
| --apply-global-php-ini | use with 0, 1 or 2 arguments from the list: error_log, date.timezone without arguments applies all global php options including the two above |
Common options:
| ___ | --disable-cagefs | disable CageFS |
| --cagefs-status | print CageFS status: ( enabled or disabled ) | |
| --set-min-uid | Set min UID | |
| --get-min-uid | Display current MIN_UID setting | |
| --print-suids | Print list of SUID and SGID programs in skeleton | |
| --do-not-ask | assume "yes" in all queries (should be the first option in command) | |
| --clean-var-cagefs | clean /var/cagefs directory (remove data of non-existent users) | |
| --set-tmpwatch | set tmpwatch command and parameters (save to /etc/cagefs/cagefs.ini file) | |
| --tmpwatch | execute tmpwatch (remove outdated files in tmp directories in CageFS for all users) | |
| --toggle-plugin | disable/enable CageFS plugin | |
| -v | --verbose | verbose output |
| --wait-lock | wait for end of execution of other cagefsctl processes (when needed) before execution of the command | |
| -h | --help | this message |
Running command inside CageFS
Note
lve-wrappers 0.6-1+
Sometimes you will need to execute a command as user inside CageFS.
If a user has shell enabled - you can simply use:
/bin/su - $USERNAME -c _command_
/sbin/cagefs_enter_user [--root] [--no-fork] $USERNAME _command_
Options:
--root– tells the utility not to reset UID and GID to user ones. It might be dangerous to call untrusted commands.--no-fork– do not create a child process for a called command. The called command will replace the cagefs_enter process with exec.--no-cpu-limit- remove all CPU limits (requireskmod-lve>= 2.0.36)--no-io-and-memory-limit- remove all limits of IO and Memory (requireskmod-lve>= 2.0.36)
If you disable CageFS for a user, then cagefs_enter will be executed without proxyexec .
You can forcibly disable cagefs_enter start via proxyexec for all users (regardless if CageFS is enabled or disabled) by specifying the parameter cagefs_enter_proxied=0 in /etc/sysconfig/cloudlinux.
/bin/cagefs_enter.proxied can be executed instead of /bin/cagefs_enter to enter CageFS without proxyexec . Note that starting cagefs_enter via proxyexec is necessary to enable sending local notification messages to users with enabled CageFS. cagefs_enter is executed via proxyexec by default.
Sanity check
Note
CageFS 6.0-34+
CageFS --sanity-check utility allows to check CageFS configuration consistency, so that an administrator can save the time investigating issues with CageFS and ensure that custom configuration is correct.
To start, run the command:
cagefsctl --sanity-check
Check cagefs mount points exists - reads cagefs.mp file and verifies if the directories specified in it really exist on the disk. To learn more, visit Mount points and Split by username
Check cagefs
users.enabledis a directory - ensures that if /etc/cagefs/users.enabled exists, then it is a directory, not a file (if it is recognized as a file, then it would cause a breakdown).Check cagefs
users.disabledis a directory - ensures that if /etc/cagefs/users.disabled exists, then it is a directory, not a file (if it is recognized as a file, then it would cause a breakdown).Check cagefs
disable.etcfsexists - checks if /etc/cagefs/etc.safe/disable.etcfs exists.Check cagefs users can enter cagefs - chooses two users in the system with enabled CageFS (the first and the second ones in the unsorted list) and tries to log in to CageFS under their credentials and see what happens. It runs
su -l "$USER" -s /bin/bash -c "whoami"and compares the output with the $USER and su command retcode estimation.
Note
If a login fails, it can be due to various reasons, that can only be determined in manual mode. The checker only gives the output of the command.
Check cagefs proxy commands configs are parsable - tries to load /etc/cagefs/*.proxy.commands files and parse them to check the syntax. In case of any parsing error the test will fail. To learn more, visit Executing by proxy.
Check cagefs virt.mp files syntax - reads all /var/cagefs///virt.mp files (if any) and checks their syntax validity. At the moment there are only two checks of the syntax: the file is not empty if it exists, and the file is not starting with the sub directory definitions (with @). To learn more, visit Per-user virtual mount points
Check MultiPHP system default PHP version – checks that MultiPHP system default PHP version is NOT Alt-PHP. That means PHP Selector should work properly. If MultiPHP system default PHP version is Alt-PHP, PHP Selector does not work and should be disabled. To learn more on how to disable PHP Selector, visit cPanel LVE Manager
Possible results of the checks:
OK - the check succeeded.
FAILED - the check revealed a problem.
SKIPPED - the check was skipped as it made no sense in such environment (e.g. wrong control panel) or can not be performed for some reason (e.g no users with enabled CageFS found). The actual result does not mean that a problem exists and can be considered as positive.
INTERNAL_TEST_ERROR - the check failed because of a problem inside the checker itself. Must be reported to the developers.
In case if at least one of the checks resulted neither OK nor SKIPPED then the checker will end with ret code >0.
LVE-stats 2
/usr/sbin/lveinfo | utility to display historical information about LVE usage. |
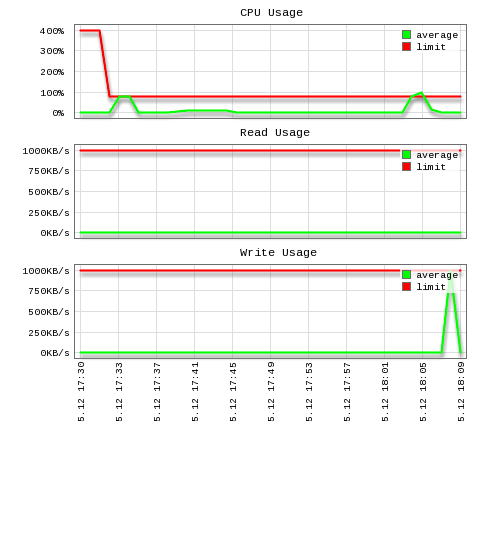
/usr/sbin/lvechart | creates a chart representing LVE usage for user. |
/usr/sbin/dbgovchart | creates a chart representing MySQL usage for user. |
/usr/sbin/lve-read-snapshot | displays information from system state (snapshots) for user. |
/usr/sbin/lve-create-db | creates/recreates database for lve-stats. |
/usr/sbin/cloudlinux-top | utility provides information about current MySQL and LVE usage of a running system in JSON format. |
/usr/sbin/cloudlinux-statistics | utility provides historical information about resource usage. |
lveinfo
Note
lve-stats-2.2-2
Usage
lveinfo [-h] [-v] [--dbgov DBGOV] [-f YYYY-MM-DD[HH:MM]]

              [-t YYYY-MM-DD[HH:MM]] [--period PERIOD] [-u USER | --id ID]

              [-d] [-o ALIAS] [-b ALIAS [ALIAS ...]] [-p 0..100]

              [--by-fault ALIAS [ALIAS ...]] [-r FAULTS]

              [--style {user,admin}] [-l LIMIT] [-c [PATH] | -j]

              [--server_id SERVER_ID] [--servers-info]

              [--show-all | --show-columns COLUMN_NAME [COLUMN_NAME ...]]

              [--time-unit TIME_UNIT] [-m {v1,v2}]

              [--blank-value [BLANK_VALUE]]
lveinfo is an utility to display historical information about LVE usage.
Optional arguments
-h, --help– show this help message and exit-v, --version– show program's version number and exit--dbgov DBGOV– show MySql Governor statistic-u USER, --user USER– use username instead of LVE id, and show only record for that user--id ID– will display record only for that LVE id-d, --display-username– try to convert LVE id into username when possible-o ALIAS, --order-by ALIAS– orders results by one of the following:ALIAS ALIAS DESCRIPTION cpu_avgaCPUaverage CPU usage cpu_maxmCPUmax CPU usage total_cpu_faultsCPUftotal number of max CPU usage faults vmem_avgaVMemaverage virtual memory usage mep_avgaEPaverage number of entry processes (concurrent connections) mep_maxmEPmax number of entry processes (concurrent connections) total_ep_faultsEPftotal number of max entry processes faults pmem_avgaPMemaverage physical memory usage (LVE version >= 6) pmem_maxmPMemmax physical memory usage (LVE version >= 6) nproc_avgaNprocaverage number of processes (LVE version >= 6) nproc_maxmNprocmax number of processes (LVE version >= 6) io_avgaIOaverage io usage (LVE version >= 6) io_maxmIOmax io usage (LVE version >= 6) total_pmem_faultsPMemFtotal number of out of physical memory faults (LVE version >= 6) total_nproc_faultsNprocFtotal number of max processes faults (LVE version >= 6) total_io_faultsIOftotal number of max io faults (LVE version >= 6) iops_avgaIOPSaverage io operations (LVE version >= 8) iops_maxmIOPSmax io operations (LVE version >= 8) total_iops_faultsIOPSftotal number of max io operations faults (LVE version >= 8) any_faultsanyFtotal number of faults of all types -b ALIAS [ALIAS ...]--by-usage ALIAS [ALIAS ...]– show LVEs with usage (averaged) within 90 percent of the limit available values:ALIAS ALIAS ALIAS DESCRIPTION cpu_avgcpuaCPUaverage CPU usage cpu_maxcpu_maxmCPUmax CPU usage vmem_avgvmemaVMemaverage virtual memory usage vmem_maxvmem_maxmVMemmax virtual memory usage mep_avgmepaEPaverage number of entry processes (concurrent connections) mep_maxmep_maxmEPmax number of entry processes (concurrent connections) pmem_avgpmemaPMemaverage physical memory usage (LVE version >= 6) pmem_maxpmem_maxmPMemmax physical memory usage (LVE version >= 6) nproc_avgnprocaNprocaverage number of processes (LVE version >= 6) nproc_maxnproc_maxmNprocmax number of processes (LVE version >= 6) io_avgioaIOaverage io usage (LVE version >= 6) io_maxio_maxmIOmax io usage (LVE version >= 6) iops_avgiopsaIOPSaverage io operations (LVE version >= 8) iops_maxiops_maxmIOPSmax io operations (LVE version >= 8) -p 0..100,--percentage 0..100– defines percentage for--by-usageoption; default90--style {user,admin}– deprecated, not used.-l LIMIT,--limit LIMIT– max number of results to display,10by default, if0no limit-c [PATH],--csv [PATH]– save statistics in CSV format;-by default (output to screen)-j,--json– display output in JSON format--server_id SERVER_ID– used with central database for multiple servers, defaultlocalhost--servers-info– show servers LVE versions--show-all– full output (show all limits); brief output is default; equivalent--show-columns all-show-columns COLUMN_NAME [COLUMN_NAME ...]– show only the listed columns;allfor all supported columnsCOLUMN_NAME DESCRIPTION FromShow start period statistics ToShow end period statistics IDLVE Id or username aCPUAverage CPU usage uCPUThe percentage of user-allocated resource CPU mCPUdeprecated lCPUCPU limit CPUfOut Of CPU usage Faults aEPAverage Entry Processes uEPThe percentage of user-allocated resource Entry processes mEPdeprecated lEPmaxEntryProc limit aVMemAverage Virtual Memory Usage uVMemThe percentage of user-allocated resource Virtual Memory mVMemdeprecated lVMemVirtual Memory Limit VMemFOut Of Memory Faults EPfEntry processes faults aPMemAverage Physical Memory Usage (LVE version >= 6) uPMemThe percentage of user-allocated resource Physical Memory (LVE version >= 6) mPMemdeprecated (LVE version >= 6) lPMemPhysical Memory Limit (LVE version >= 6) aNprocAverage Number of processes (LVE version >= 6) uNprocThe percentage of user-allocated resource Number of processes (LVE version >= 6) mNprocdeprecated (LVE version >= 6) lNprocLimit of Number of processes (LVE version >= 6) PMemFOut Of Physical Memory Faults (LVE version >= 6) NprocFNumber of processes faults (LVE version >= 6) aIOAverage I/O (LVE version >= 6) uIOThe percentage of user-allocated resource I/O (LVE version >= 6) mIOdeprecated (LVE version >= 6) lIOI/O Limit (LVE version >= 6) IOfOut Of I/O usage Faults (LVE version >= 6) aIOPSAverage I/O Operations (LVE version >= 8) mIOPSdeprecated (LVE version >= 8) uIOPSThe percentage of user-allocated resource I/O Operations (LVE version >= 8) lIOPSI/O Operations Limit (LVE version >= 8) IOPSfOut Of I/O Operations Faults (LVE version >= 8) --time-unit TIME_UNIT– time step for grouping statistic in minutes; 1 min., by default; can usem\|h\|dsuffixes; for example:1h or 1h30m or 1d12h-m {v1,v2},--compat {v1,v2}–v1- return old output mode;v2- new mode; defaultv1; you can change default in config--blank-value [BLANK_VALUE]– Use to fill unsupported limits; default--f YYYY-MM-DD[ HH:MM],--from YYYY-MM-DD[ HH:MM]– run report from date and time in[YY]YY-MM-DD[ HH:MM]format; if not present last 10 minutes are assumed-t YYYY-MM-DD[ HH:MM],--to YYYY-MM-DD[ HH:MM]– run report up to date and time in[YY]YY-MM-DD[ HH:MM]format; if not present, reports results up to now--period PERIOD– time period; specify minutes withm,h- hours, days withd, and values:today,yesterday;5m- last 5 minutes,4h- last four hours,2d- last 2 days, as well astoday--by-fault ALIAS [ALIAS ...]– show LVEs which failed on max processes limit or memory limitALIAS ALIAS ALIAS DESCRIPTION mcpucpuCPUftotal number of max CPU usage faults memvmemVMemFtotal number of out of virtual memory faults mepepEPftotal number of max entry processes faults pmempmemPMemFtotal number of out of physical memory faults (LVE version >= 6) nprocnprocNprocFtotal number of max processes faults (LVE version >= 6) ioioIOftotal number of max io faults (LVE version >= 6) iopsiopsIOPSftotal number of max io operations faults (LVE version >= 8) any_faultsanyanyFtotal number of faults of all types -r FAULTS, --threshold FAULTS– in combination with--by-fault, shows only LVEs with number of faults above; default1
Prefixes Kb, Mb and Gb indicates powers of 1024.
Note
All ALIAS options are not case sensitive.
lvechart
/usr/sbin/lvechart - creates a chart representing LVE usage for user.
Usage
/usr/sbin/lvechart [OPTIONS]
Acceptable options
--help | This help screen |
--version | Version number |
--from | Run report from date and time in YYYY-MM-DD HH:MM format (if not present, last 10 minutes are assumed) |
--to= | Run report up to date and time in YYYY-MM-DD HH:MM format (if not present, reports results up to now) |
--period= | Time period: specify minutes with m, h - hours, days with d, and values: today, yesterday; 5m - last 5 minutes, 4h - last four hours, 2d - last 2 days, as well as today |
--id= | LVE id will display record only for that LVE id |
--user= | Use username instead of LVE id , and show only record for that user |
--server= | Server id will display record for that server, instead of default (current) |
--output= | Filename to save chart as, if not present, output will be sent to STDOUT |
--show-all | Show all graphs (by default shows graphs for which limits are set) |
--style= | admin, user set chart style, CPU limits are normalized to 100% in user’s style |
--format= | svg, png set chart output format |
dbgovchart
/usr/sbin/dbgovchart - creates a chart representing MySQL usage for user.`
Usage
/usr/sbin/dbgovchart [OPTIONS]
Acceptable options
--help | This help screen |
--version | Version number |
--from= | Run report from date and time in YYYY-MM-DD HH:MM format (if not present, last 10 minutes are assumed) |
--to= | Run report up to date and time in YYYY-MM-DD HH:MM format (if not present, reports results up to now) |
--period= | Time period: specify minutes with m, h - hours, days with d, and values: today, yesterday; 5m - last 5 minutes, 4h - last four hours, 2d - last 2 days, as well as today` |
--user= | mysql username |
--output= | Filename to save chart as, if not present, output will be sent to STDOUT |
--show-all | Show all graphs (by default shows graphs for which limits are set) |
--server= | Server id will display record for that server, instead of default (current) |
--style= | admin, user set chart style, CPU limits are normalized to 100% in user’s style |
--format= | svg, png set chart output format |
lve-read-snapshot
Usage
lve-read-snapshot [-h] [--version] [-f FROM [FROM ...]] [-t TO [TO ...]
                  [ -p PERIOD | --timestamp TIMESTAMP]
                  [-i ID | -u USER] [-l] [-o file] [-j] [--stats]
                  [--unit unit]
Reads LVE system state snapshots for LVE/user.
Optional arguments
-h, --help– show this help message and exit--version– version number-f FROM [FROM ...],--from FROM [FROM ...]– run report from date and time inYYYY-MM-DD HH:MMformat, if not present last 10 minutes are assumed (default:2016-10-24 19:28)-t TO [TO ...],--to TO [TO ...]– run report up to date and time inYYYY-MM-DD HH:MMformat, if not present, reports results up to now (default:2016-10-24 19:38)-p PERIOD,--period PERIOD– time period specify minutes withm,h- hours, days withd, and values:today,yesterday,5m- last 5 minutes,4h- last four hours,2d- last 2 days, as well as today (default:10m)--timestamp TIMESTAMP– time stamp in unix format for get one snapshot (default:None)-i ID, --id ID– LVE id to show records for (default:None)-u USER,--user USER– user account to show records for (default:None)-l,--list– show timestamp list only (default:False)-o file,--output file– filename to save snaphots report to, if not present,output will be sent to STDOUT (default:None)-j,--json– output in json format (default:False)--stats– output stats, instead of snapshots (default:False)--unit unit– group stats by time unit. Example values3h,24h,1d,1w. Other possible value isautofor grouping by each incident (default:1d)
One of -u --user or -i --id should be specified.
lve-create-db
Usage
lve-create-db [-h] [--recreate] [--print-sql]
                   [--update-serverid-prompt] [--update-serverid-auto]
                   [--validate]
Creates a database for lve-stats.
Optional arguments
-h,--help– show this help message and exit--recreate– drops and recreates database even if tables exists (default:False)--print-sql– prints sql and exits, without creating db (default:False)--update-serverid-prompt– update exist server ID or create new one (default:False)--update-serverid-auto– update exist server ID with uuid (default:False)--validate– check the correctness of the database structure (default:False)
cloudlinux-top
Utility provides information about current MySQL and LVE usage of a running system in JSON format.
Usage
cloudlinux-top [-h] [-v] [-j] [--hide-mysql]
               [-u USERNAME | -r FOR_RESELLER] [-d DOMAIN] [-m MAX]
               [-o ORDER_BY]
Optional arguments
-h, --help– show this help message and exit-v, --version– show program version number and exit-j, --json– return data in JSON format--hide-mysql| `don't show MySQL related info-u USERNAME,--username USERNAME– show data only for a specific user. Can be used to filter the output; returns users with username%USERNAME%-r FOR_RESELLER,--for-reseller FOR_RESELLER– get information only about specified reseller and his users-d DOMAIN,--domain DOMAIN– show data only for a specific domain. Can be used to filter the output; returns users with domain%DOMAIN%-m MAX,--max MAX– show up toNrecords. If--maxkey is omitted. By default will show top 25 users-o ORDER_BY,--order-by ORDER_BY– sort output by resource usage; available options:cpu,mysql_cpu,io,mysql_io,iops,ep,nproc,pmem
Output format
{
  "mySqlGov": "enabled",              # possible values: enabled, error
  "mySqlGovMode": "abusers",          # see “MySQL Governor > Modes Of Operation”
                                      # if MySQL Governor is not enabled, value is "none"

  "resellers": [                      # list of resellers (available only with
                                      # reseller limits feature)
      {
          "id": 1000020005,           # internal record id
          "limit": <lve_section>,     # current limits (last 5 seconds)
          "name": "reseller_name",    # reseller’s login in control panel
          "usage": <lve_section>      # current usage (last 5 seconds)
      }
  ],
  "result": "success",                # see the ‘errors handling’ section
  "timestamp": 1522858537.337549,
  "users": [
      {
          "domain": "domain.com",     # user’s primary domain (from control panel)
          "id": 20005,                # lve_id, same as user id in /etc/passwd file
          "limit": <lve_section>,     # limits for last 5 seconds
          "reseller": "reseler1",     # user’s reseller (from control panel)
          "usage": <lve_section>,     # usage for last 5 seconds
          "username": "user"          # username from /etc/passwd file or “N/A” if user
                                      # with such id does not exist
       }
   ]
 }
The structure * of <lve_section>:
{
"cpu": {
 "all": 50.0,      # CPU usage or limit (LVE only)
 "mysql": 0.0*     # CPU usage or limit (MySQL Governor only)
},
"ep": 1.0,           # number of entry processes
"io": {
 "all": 0.0,       # IO usage or limit (LVE only)
 "mysql": 0.0**     # IO usage or limit (MySQL Governor only)
},
"iops": 0.0,         # IO operations per second
"mem": 258048,       # memory usage or limit
"pno": 1.0           # number of processes
}
Note
- you can modify this structure using
--showoption, see usage examples for details. - MySQL values are only present when MySQL Governor statistics is available and
--hide-mysqloptions is not used.
Units of measurement
For limits and usage sections we use the following units of measurement.
| Value | Units of measurement |
| cpu (lve and mysql) | percentage of one CPU core |
| io (lve and mysql) | bytes per second |
| iops | number of IO operations per second |
| mem | bytes |
| ep | number of entry processes |
| pno | number of processes |
Errors handling
The format of the error message is the same as in the other cloudlinux- * utilities. When everything is ok, the result value is success. Otherwise, it contains error message. In case of unexpected errors, the output will be as follows.
cloudlinux-top --json
{
  "context": {
      "error_text": "Very bad error"
  },
  "result": "An error occured: \"%(error_text)s\"",
  "timestamp": 1523871939.639394
}
Examples
get 100 users ordered by CPU usage
cloudlinux-top --json --order-by cpu --max=100get information about one user
cloudlinux-top --json -u usernameget information about reseller and his users
cloudlinux-top --json --for-reseller=reseller_nameshow only IO limits and usage
cloudlinux-top --json --show=io
cloudlinux-statistics
cloudlinux-statistics is a CLI utility that provides historical information about resource usage.
Usage
cloudlinux-statistics [-h] [-j] [-v] [--by-usage BY_USAGE]
                      [--percentage 0..100] [--by-fault BY_FAULT]
                      [--threshold THRESHOLD] [--server_id SERVER_ID]
                      [-f FROM] [-t TO] [--period PERIOD]
                      [--limit LIMIT]
                      [--show COLUMN_NAME [COLUMN_NAME ...]]
                      [-o ORDER_BY] [--id ID] [--time-unit TIME_UNIT]
                      [-r FOR_RESELLER]
Optional arguments
-h,--help– show this help message and exit-j,--json– return data in JSON format-v,--version– show program version number and exit--server_id SERVER_ID,--server-id SERVER_ID– can be used with the central database for multiple servers; default...--limit LIMIT– limit the number of results to display,0is unlimited--show COLUMN_NAME [COLUMN_NAME ...]– show only listed columns;allfor all supported columns (fields)Key Fields to show allall available fields cpuCPU field ioIO field iopsIOPS field epentry processes (concurrent connections) field nprocnumber of processes field pmemphysical memory field vmemvirtual memory field mysqlmysql_cpu&mysql_iofield-o ORDER_BY,--order-by ORDER_BY– order results by one of the following keys (fields):FIELD DESCRIPTION any_faultstotal number of faults of all types cpuaverage CPU usage mysql_cpuaverage MySQL CPU usage ioaverage IO usage mysql_ioaverage MySQL IO usage iopsaverage IO operations; (LVE version >= 8) epaverage number of entry processes (concurrent connections) nprocaverage number of processes pmemaverage physical memory usage vmemaverage virtual memory usage cpu_faultstotal number of CPU usage faults io_faultstotal number of max IO faults iops_faulttotal number of max IO operations faults; (LVE version >= 8) ep_faultstotal number of max entry processes faults nproc_faultstotal number of max processes faults pmem_faultstotal number of out of physical memory faults vmem_faultstotal number of out of virtual memory faults -r FOR_RESELLER,--for-reseller FOR_RESELLER– show statistics only for given reseller and his users
Filter items by resource usage.
--by-usage BY_USAGE– show LVEs with usage (averaged) within 90 percent of the limit available valuesFIELD DESCRIPTION cpuaverage CPU usage mysql_cpuaverage MySQL CPU usage ioaverage IO usage mysql_ioaverage MySQL IO usage iopsaverage IO operations; (LVE version >= 8) epaverage number of entry processes (concurrent connections) nprocaverage number of processes pmemaverage physical memory usage vmemaverage virtual memory usage -percentage 0..100– define percentage for--by-usageoption; default90
Filter items by the number of faults.
--by-fault BY_FAULT– show only accounts that have some faults for the given limitFIELD DESCRIPTION anyfaults of all types cpuCPU usage faults iomax IO usage faults iopsmax IO operations faults; (LVE version >= 8) epmax entry processes faults nprocmax processes faults pmemout of physical memory faults vmemout of virtual memory faults --threshold THRESHOLD– in combination with--by-faultshows only accounts with the number of faults more than given; default1
Filter items by a time interval.
Allows to get information for the given period of time; you can either set --from and --to options, or just get information for the recent time period using --period option.
Note
--from and --to values are ignored when --period is set.
-f FROM,--from FROM– run report from date and time in[YY]YY-MM-DD[ HH:MM]format; if not present, last 10 minutes are assumed-t TO,--to TO– run report up to date and time in[YY]YY-MM-DD[ HH:MM]format; if not present, reports results up to now--period PERIOD– time period; specify minutes withm, hours withh, days withd, and values:today,yesterday;5m- last 5 minutes,4h- last four hours,2d- last 2 days, andtoday
Get detailed statistics.
--id ID– get detailed statistics for database record with the given id--time-unit TIME_UNIT– group statistics using the given time; 1 minute by default. For example:1hor1h30mordynamic; available only in pair with--id
Output format
There are two different JSON formats used for summary statistics and detailed statistics.
Summary statistics
cloudlinux-statistics --json
 {
 "resellers": [
   {
     "usage": <lve_section>,
     "faults": <lve_section>,
     "name": "reseller",
     "limits": <lve_section>,
     "id": 1000020005
   }
 ],
 "timestamp": 1522920637,
 "mySqlGov": "enabled",            # possible values: ”enabled”, “error”
 "result": "success",
 "users": [
   {
     "username": "username",
     "domain": "example.com",
     "reseller": "reseller",
     "limits": <lve_section>,
     "faults": <lve_section>,
     "usage": <lve_section>,
     "id": 20005
   }
 ]
 }
Detailed statistics
cloudlinux-statistics --json --id=20001
 {
 "timestamp": 1523011550,
 "mySqlGov": "enabled",           # possible values: ”enabled”, “error”
 "result": "success",
 "user": [
   {
     "usage": <lve_section>,
     "faults": <lve_section>,
     "from": 1523011144,
     "limits": <lve_section>,
     "to": 1523011143
   },
 ...
   {
     "usage": <lve_section>,
     "faults": <lve_section>,
     "from": 1523011204,
     "limits": <lve_section>,
     "to": 1523011203
   }
 ]
 }
For both, summary statistics and detailed statistics, <lve_section> is the same and looks like following *.
{
   "ep": {
     "lve": 1        # number of entry processes
   },
   "vmem": {
     "lve": 2428928  # virtual memory usage or limit (deprecated)
   },
   "iops": {
     "lve": 0        # io operations per second
   },
   "io": {
     "lve": 0.0,     # io usage or limit (lve only)
     "mysql": 0.0**   # io usage or limit (mysql only)
   },
   "nproc": {
     "lve": 1        # number of processes in lve
   },
   "cpu": {
     "lve": 25.6,    # cpu usage (lve only)
     "mysql": 0.0*   # cpu usage (mysql governor only)
   },
   "pmem": {
     "lve": 360448   # physical memory usage or limit
   }
 }
Note
- you can specify only required fields using
--showoption; mysqlfields are only available with MySQL Governor installed.
Units of measurement
For limits and usage sections we use the following units of measurement.
| Value | Units of measurement |
cpu (LVE and MySQL) | percentage of one CPU core |
io (LVE and MySQL) | bytes per second |
iops | number of IO operations per second |
pmem and vmem | bytes |
ep | number of entry processes |
nproc | number of processes in LVE |
Errors handling
The format of the error message is the same as in the other cloudlinux- * utilities. When everything is ok, the result value is success. Otherwise, it contains error message.
cloudlinux-statistics --json
{
  "context": {
      "error_text": "Very bad error"
  },
  "result": "An error occured: \"%(error_text)s\"",
  "timestamp": 1523871939.639394
}
Examples
- get top 10 users ordered by CPU usage for today
cloudlinux-statistics --json --order-by=cpu --period=today --limit=10
- get users that hit IO limit more than 10 times for today
cloudlinux-statistics --json --period=today --by-fault=io --threshold=10
- get users that used more than 80% of CPU in last 24 hours
cloudlinux-statistics --json --by-usage=cpu --percentage=80 --period=24h
- get information only about reseller and his users
cloudlinux-statistics --json --for-reseller=reseller_name
- get information only about CPU and IO usage
cloudlinux-statistics --json --show=cpu,io
MySQL Governor
dbtopmonitors MySQL usage on per user bases.dbctlis a command line tool to manage DB Governor configuration.lveinfo --dbgovprovides historical information about usage and customer restrictions.dbgovchartgenerates charts for MySQL usage.
dbtop
Utility to monitor MySQL usage. Requires db_governor to be running. It shows usage for the current, mid and long intervals.
Options:
| -c | show one time user list (no interactive mode) |
| -r interval | refresh interval for interactive mode (in seconds) |
Control keys
| z | toggle color mode and two-color mode |
| q | F10, Ctrl-c - quit program |
| u | sort table by username |
| c | sort table by cpu column |
| r | sort table by read column |
| w | sort table by write column |
| l | sort by restriction level |
| t | sort by time before restrictions will be lifted. |
Control keys, that sort table, displays into header of table bold and underlined symbol. Sorted field will be highlighted by *. CAUSE field shows current stage, reason for restriction and number of seconds before restriction will be lifted: Values of column ' CAUSE ' - cause of restriction or freezing: Possible stages:
-OK1- Restriction 12- Restriction 23- Restriction 34- Restriction level 4
| c - current | (current value of parameter) |
| s - short | (average value of 5 last values of parameter) |
| m - middle | (average value of 15 last values of parameter) |
| l - long | (average value of 30 last values of parameter) |
| and parameter which is cause of restriction | |
| 1/s:busy_time/12 | first level restricted account with short average restriction by busy_time with 12 seconds left before re-enabled. |
Display fields:
- cpu - number in %, shows cpu usage by user
- read - number of bytes (kbytes, mbytes, gbytes) which user reads per second
- write - number of bytes (kbytes, mbytes, gbytes) write user reads per second
Accounts highlighted in red color means that the account is restricted.
Accounts highlighted in blue color are in cool down period
Command line parameters of dbtop utility:
-r - dbtop refresh period in seconds ( dbtop -r12 )
dbctl
usage: dbctl command [parameter] [options]
Commands:
| set | set parameters for a db_governor |
| list | list users & their limits. It will list all users who had been active since Governor restart, as well as those for who explicit limits were set |
| list-restricted | list restricted customers, with their limits, restriction reason, and time period they will still be restricted |
| ignore | ignore particular user |
| watch | start observing particular user again |
| delete | remove limits for user/use defaults |
| restrict | restrict user using lowest level (or if --level specified, using the specified level) |
| unrestrict | unrestrict username (configuration file remains unchanged) |
| unrestrict-all | unrestrict all restricted users (configuration file remains unchanged) |
| --help | show this message |
| --version | version number |
| --lve-mode | set DB Governor mode of operation. Available values: off/abusers/all/single/on |
| off - monitor only, don't throttle | |
| abusers - when user reaches the limit, put user's queries into LVE for that user (experimental) | |
| all - user's queries always run inside LVE for that user (experimental) | |
| single - single LVE for all abusers. | |
| on - same as single (deprecated) |
Parameters
| default | set default parameter |
| usrename | set parameter for user |
Options
| --cpu=N | limit CPU (pct) usage |
| --read=N | limit READ (MB/s) usage |
| --write=N | limit WRITE (MB/s) usage |
| --level=N | level (1,2,3 or 4) specified (deprecated) - this option is available only for period mode: |
<restrict_mode use="period"/> (see Configuration)
The default mode is " limit " - when a user hits limits, the account will be marked as restricted and if the user does not hit the limit again during " unlimit=1m " account will be unrestricted. This mode doesn't have any additional levels/penalties.
<restrict_mode use="limit" unlimit="1m"/>
Changing the "unlimit" can be done only via the configuration file (see Configuration).
--slow=N: limit time (in seconds) for long running SELECT queries
Options for parameter list:
--kb | show limits in Kbytes no pretty print |
--bb | show limits in bytes no pretty print |
--mb | show limits in Mbytes no pretty print |
Examples:
dbctl set test2 --cpu=150,100,70,50 --read=2048,1500,1000,800
sets individual limits for cpu (current, short, middle period) and read (current, short, middle, long periods) for user test2
dbctl set default --cpu=70,60,50,40
changes default cpu limits.
All new limits will be applied immediately
To unrestrict user:
dbctl unrestrict username
To unrestrict all users:
dbctl unrestrict-all
To restrict user:
dbctl restrict dbgov
To restrict user to level 2 restriction:
dbctl restrict dbgov --level=2
To make Governor to ignore user:
dbctl ignore username
Delete user's limits, and use defaults instead:
dbctl delete username
Show limits as bytes:
dbctl list --bb
lveinfo --dbgov
lveinfo --dbgov --help
Displays information about DB Governor historical usage
Usage:
lveinfo [OPTIONS]
Optional arguments:
-h, --help | show this help message and exit |
-u USER, --user USER | system user name |
--id ID | user id |
-l LIMIT, --limit LIMIT | max number of results to display, if 0 – no limit |
--by-usage ALIAS [ALIAS ...] | show LVEs with usage (averaged) within 90 percent of the limit; available values: COLUMN_NAME–ALIAS–DESCRIPTIONcpu–CPU–average CPU usageio–IO–average IO usage |
-p 0..100, --percentage 0..100 | defines percentage for the --by-usage option; default is 90 |
-o ALIAS, --order-by ALIAS | orders results by one of the following:ALIAS – DESCRIPTIONcon – average connections (deprecated)cpu – average CPU usageread – average READ usagewrite – average WRITE usageio – average READ+WRITE usage |
-b ALIAS [ALIAS ...], --format ALIAS [ALIAS ...] | show only specific fields into output: COLUMN_NAME – ALIAS – DESCRIPTIONts – TS – timestamp recordsusername – USER – user nameid – IDuser idcpu – CPU – average CPU usageread – READ – average READ usagewrite – WRITE – average WRITE usagecon – CON – average connections (deprecated)lcpu – lCPU – CPU limitlread – lREAD – READ limitlwrite – lWRITE – WRITE limit- – RESTRICT – C - CPU restrict, R - read restrict, W - write restrict |
--show-all | full output (show all limits); brief output is default |
--server_id SERVER_ID, --server-id SERVER_ID | used with central database for multiple servers, default is 2d823047-a |
--time-unit TIME_UNIT | time step for grouping statistic in minutes; 1 min. by default; can use m,h,d suffixes or can use dyn[amic] for using in the v1 mode; for example: 1h or 1h30m or 1d12h |
-c [PATH], --csv [PATH] | save statistics in CSV format; - by default (output to screen) |
-j, --json | display output in JSON format |
-f FROM, --from FROM | run report from date and time in the [YY]YY-MM-DD[ HH:MM] format; if not present, the last 10 minutes are assumed |
-t TO, --to TO | run a report up to date and time in the [YY]YY-MM-DD[ HH:MM] format; if not present, reports results up to now |
--period PERIOD | time period; specify minutes with m, hours with h, days with d and values: today, yesterday; 5m - last 5 minutes, 4h - last four hours, 2d - last 2 days, as well as today |
dbgovchart
dbgovchart is analog of lvechart tool to create charts representing customer's to MySQL usage
Usage: /usr/sbin/dbgovchart [OPTIONS]
Acceptable options are:
--help      This help screen
--version   Version number
--from=     Run report from date and time in YYYY-MM-DD HH:MM format
            if not present last 10 minutes are assumed
--to=       Run report up to date and time in YYYY-MM-DD HH:MM format
            if not present, reports results up to now
--period=   Time period
            specify minutes with m,  h - hours, days with d, and values:
            today, yesterday
            5m - last 5 minutes, 4h - last four hours, 2d - last 2 days,
            as well as today
--user=     mysql username
--output=   Filename to save chart as, if not present, output will be sent to STDOUT
--show-all  Show all graphs (by default shows graphs for which limits are set)
Charts examples:
PHP Selector
| /usr/bin/alt-php-mysql-reconfigure.py | Reconfigures alt-php extensions to use correct MySQL library, based on the one installed in the system. |
selectorctl
selectorctl is a new tool that replaces cl-selector (which is deprecated and should not be used anymore) and piniset. It is available starting with CageFS 5.1.3.
All new features will be implemented as part of selectorctl.
Common options
| --interpreter (-i) : | chooses the interpreter to work with. Currently only PHP is supported. If omitted, --interpreter=php is implied. |
| --version (-v) : | specifies alternatives version to work with |
| --user (-u) : | specifies user to take action upon. |
| --show-native-version (-V) : | prints the version of native interpreter |
Global options
The global options modify settings in /etc/cl.selector/defaults.cfg file.
| --list (-l) : | lists all available alternatives for an interpreter. For instance on server with Alt-PHP installed, it produces the following output. Columns are: short alternative version, full alternative version and path to php-cgi binary. |
| $ selectorctl --list 5.2 5.2.17 /opt/alt/php52/usr/bin/php-cgi 5.3 5.3.28 /opt/alt/php53/usr/bin/php-cgi 5.4 5.4.23 /opt/alt/php54/usr/bin/php-cgi 5.5 5.5.7 /opt/alt/php55/usr/bin/php-cgi | |
| --summary (-S) : | prints alternatives state summary. Output format: alternative version, state ('e' for 'enabled', '-' otherwise), chosen as default one or not ('d' for 'default', '-' otherwise). For example: |
| $ selectorctl --summary 5.2 e - 5.3 e - 5.4 e - 5.5 e - native e d | |
if used with --show-native-version displays version for native interpreter: | |
| $ selectorctl --summary --show-native-version 5.2 e - 5.3 e - 5.4 e - 5.5 e - native(5.3) e d | |
| --current (-C) : | prints currently globally selected default version (it is stored in /etc/cl.selector/defaults.cfg file): |
| $ selectorctl --current native native /usr/bin/php | |
If used with --show-native-version , native interpreter version is displayed as well: | |
| --current --show-native-version native(5.3) native(5.3.19) /usr/bin/php | |
| --set-current (-B): | sets specified version as globally default one (in /etc/cl.selector/defaults.cfg file). For example, to set current default version of PHP to 5.4, use: |
| $ selectorctl --set-current=5.4 | |
| --disable-alternative (-N): | adds state=disabled option to alternative section. With it a corresponding alternative gets removed from user alternatives selection list. For instance to disable PHP 5.2, run: |
| $ selectorctl --disable-alternative=5.2 | |
| --enable-alternative (-Y): | Enables alternative version, removes state=disabled option, if present, from alternative section. For example to enable PHP 5.2: |
| $ selectorctl --enable-alternative=5.2 | |
| --enable-extensions (-E): | enables extensions for particular PHP version by adding comma-separated list of extensions of modules for alternative in /etc/cl.selector/defaults.cfg . Requires --version option. For example: |
| $ selectorctl --enable-extensions=pdo,phar --version=5.2 | |
| --disable-extensions (-D): | removes extensions for a particular PHP version. Comma-separated list of extensions will be removed from /etc/cl.selector/defaults.cfg . Requires --version . Example: |
| $ selectorctl --disable-extensions=pdo,phar --version=5.2 | |
| --replace-extensions (-R): | replaces all extensions for particular PHP version to the list of comma separated extensions. Requires --version option . Example: |
| $ selectorctl --replace-extensions=pdo,phar --version=5.2 | |
| --list-extensions (-G): | lists extensions for an alternative for a particular version. Requires --version . Example: |
| $ selectorctl --list-extensions --version=5.3 ~ xml - xmlreader - xmlrpc - xmlwriter - xrange + xsl | |
| Plus sign (+) stands for 'enabled', minus (–) for 'disabled', tilde (~) means compiled into interpreter or enabled in php global config file /opt/alt/phpXX/etc/php.ini. Enabled and disabled state relates to presence in /etc/cl.selector/defaults.cfg file. |
End user options
All end user settings are contained in individual user's alt_php.ini files and controlled using selectorctl command.
| --user-summary (-s): | prints user alternatives state summary. Example: |
| $ selectorctl --user-summary --user=user1 5.2 e - - 5.3 e - - 5.4 e - - 5.5 e - - native e d s | |
Columns are: alternative version, state ('e' for 'enabled', '-' otherwise), chosen as default one or not('d' for 'default', '-' otherwise), selected as user default one or not ('s' for 'selected', '-' otherwise). If used with --show-native-version , version for native interpreter is shown in parenthesis: | |
| $ selectorctl --user-summary --user=user1 --show-native-version 5.2 e - - 5.3 e - - 5.4 e - - 5.5 e - - native(5.3) e d s | |
--user option is required. | |
| --current (-c): | prints currently globally selected default version (in /etc/cl.selector/defaults.cfg file): |
| $ selectorctl --current 5.3 5.3.28 /opt/alt/php53/usr/bin/php-cgi | |
If used with --show-native-version to display native version: | |
| $ selectorctl --user-current --user=user1 5.3 5.3.28 /opt/alt/php53/usr/bin/php-cgi | |
--user option is required. | |
| --set-user-current (-b): | sets specified version as the one to use for this end user: |
| $ selectorctl --set-user-current=5.4 --user=user1 | |
| changes user symlinks for the PHP interpreter to point to alternative 5.4. | |
| --user option is required. | |
| --enable-user-extensions (-e): | Enables comma-separated list of extensions for the user user. Information is saved to alt_php.ini file. Requires --version and --user options. |
| $ selectorctl --enable-user-extensions=pdo,phar --version=5.2 --user=user1 | |
| --disable-user-extensions (-d): | Disables extensions provided as comma-separated list. Requires --version and --user options. |
| $ selectorctl --disable-user-extensions=pdo,phar --version=5.2 --user=user1 | |
| --for-all-users: | Allows to enable/disable extensions for all users with the required PHP version. Works only with --enable-user-extensions or --disable-user-extensions option. |
$ selectorctl --enable-user-extensions=gd --version=5.3 --for-all-users$ selectorctl --disable-user-extensions=gd --version=5.3 --for-all-users | |
| --replace-user-extensions (-r): | Replaces extensions with a provided comma-separated list of extensions Requires --version and --user options: |
| $ selectorctl --replace-user-extensions=pdo,phar --version=5.2 --user=user1 | |
| --reset-user-extensions (-t): | Resets extensions for end user to default list of extensions as defined in default.cfg . Requires --version and --user options. |
| $ selectorctl --reset-user-extensions --version=5.2 --user=user1 | |
| --list-user-extensions (-g): | lists enabled user extensions for an alternative. Requires --version and --user options. |
| $ selectorctl --list-user-extensions --version=5.3 --user=user1 xml xmlreader xmlrpc | |
if --all option present, command will list all alternatives extensions marked enabled or disabled for given user. For example: | |
| $ selectorctl --list-user-extensions --version=5.3 --user=user1 --all - xmlreader - xmlrpc - xmlwriter - xrange + xsl | |
| Plus sign (+) stands for 'enabled', minus (–) stands for 'disabled'. Enabled and disabled state relates to presence or absence of corresponding extensions in user alt_php.ini file. | |
| --add-options (-k): | adds options (as in php.ini ) to user alt_php.ini file. For example: |
| $ selectorctl --add-options=log_errors:on,display_errors:on --version=5.2 --user=user1 | |
adds log_error and display_errors options with values 'on' to user alt_php.ini file overwriting default values for a user. Requires --version and --user options. | |
| --replace-options (-m): | replaces all options in user alt_php.ini file with specified ones. Requires --version and --user options. |
| $ selectorctl --replace-options=log_errors:on,display_errors:on --version=5.2 --user=user1 | |
| --delete-options (-x): | removes custom options from user alt_php.ini file. Requires --version and --user options. |
| $ selectorctl --delete-options=log_errors,display_errors --version=5.2 --user=user1 | |
| --print-options (-P): | print options from /etc/cl.selector/php.conf file with default values or ones overwritten in user's alt_php.ini file. |
| $ selectorctl --print-options --version=5.2 --user=user1 TITLE:allow_url_fopen DEFAULT:On COMMENT:Allows PHP file functions to retrieve data from remote locations over FTP or HTTP. This option is a great security risk, thus do not turn it on without necessity. TYPE:bool ... | |
Requires --user option. --version option is optional. When --version is omitted, options for current selected version will be printed. By default outputs as plain test. If --json , --csv , --perl is specified, outputs data in corresponding format. For example, with --perl option, the output is perl hash structure that can be evaluated. | |
| --reset-options (-z): | removes custom options from alt_php.ini files for ALL users and versions. Backup files in home folders are cleared. |
| $ selectorctl --reset-options | |
The ranges of affected customers or versions can be narrowed with --version or --user options : | |
| $ selectorctl --reset-options --user=user1,user2 --version=5.3,5.4 | |
| --list-users (-L): | list users that use particular version of interpreter, specified with --version option. For example, to see all users that use PHP version 5.3: |
| $ selectorctl --list-users --version=5.3 | |
| --change-to-version (-T): | changes all (or particular user) from one interpreter version to another. |
| $ selectorctl --change-to-version=5.2 --version=5.3 |
Additional options
| --base64 (-Q) | Sometimes PHP options values can contain commas and other symbols that break command line formatting. In such a case convert a key:value pair into base64 and pass it as value for option-related arguments. For example, to add disable_functions=exec,popen,system and display_errors=on to user options, do the following: |
| $ selectorctl --add-options=`echo disable_functions:exec,popen,system | |
Option -w 0 of base64 executable stands for 'disable wrapping of lines' . Without it base64 output will break the command. | |
| --quiet | makes selectorctl continue when it encounter option not found in php.conf. Without it selectorctl exits with error. |
Python Selector
Warning!
selectorctl command line tool is not supported in the new Python Selector. You can use cloudlinux-selector command line tool instead.
Below, there is a list of commands hoster and end user can run in a command line.
Hoster
Note
When running user command as root, please use --user option.
Get all Python-related information: default version, a list of supported versions, status of Python Selector, a list of users, their applications, etc:
cloudlinux-selector [get] [--json] --interpreter pythonJSON output for
getcommand:
{
  "selector_enabled": true | false,
  "default_version": "2.7.15",
  "result": "success",
  "timestamp": 1508667174.220027,
  “cache_status”: “ready”,         //  or “updating” during automatic yum cache rebuild
  "available_versions": {   //  begin of  “versions”
      "2.7.15" : {   //   begin of version "2.7.15"
          "status": "enabled",  //  enabled, disabled, not_installed, installing, removing, locked
          “base_dir”: “/opt/alt/alt-python27”   //  empty when version is not installed
          “users”: {   //  begin of  “users”
              “user1”: {   //  begin of “user1”
	“homedir”: “/home/user1”,
                 “applications”: {    //  begin of “applications”
                     “apps_dir/app1” : {   //   begin of application “apps_dir/app1”
                         “domain”: “cltest1.com”,
                         “app_uri”: “apps/my-app1”,
                         “startup_file” : “run.py”,
                         “entry_point” : “app”,
                         “app_status” : “started”,   // ‘started’ or ‘stopped’
                         “config_files” : [
                             “requirements.txt”,
                             “requirements-migration.txt”
                         ],
                         “env_vars” : {
                             “var1” : “value1”,
                             “var2” : “value2”
                         },
                     },   // end of application “apps_dir/app1”
                     “apps_dir/app2” : {    //   begin of application “apps_dir/app2”
                          << data for application “apps_dir/app2”  (same structure as for application “apps_dir/app1” above) >>
                     },   //  end of application “apps_dir/app2”
                 },   //  end of “applications”
              },   //  end of “user1”
              “user2”: {   //  begin of “user2”
                  << data for user “user2”  (same structure as for “user1” above) >>
              },   //  end of “user2”
          },   // end of “users”
        },    //  end of version “2.7.15”
      "8.21.5" : {   //   begin of version "3.3.7"
            << data for version "3.3.7"  (same structure as for version “2.7.15” above) >>
        },    //  end of version “3.3.7”
    },    //  end of “versions”
}   //   end of json
Set default version, supported versions, and status of Python Selector:
cloudlinux-selector set [--json] --interpreter python (--selector-status <enabled,disabled> | --default-version <str> | --supported-versions <str>)
Examples
Enable Python Selector:
cloudlinux-selector set --json --interpreter python --selector-status enabledSet default Python Selector version as 3.3:
cloudlinux-selector set --json --interpreter python --default-version 3.3Set supported Python Selector version as 3.3:
cloudlinux-selector set --json --interpreter python --supported-versions='{"2.7": false, "3.3": true}'Install a specific Python version:
cloudlinux-selector install-version --json --interpreter python --version 2.7Uninstall a specific Python version:
cloudlinux-selector uninstall-version --json --interpreter python --version 2.7Enable a specific Python version:
cloudlinux-selector enable-version --json --interpreter python --version 2.7Disable a specific Python version:
cloudlinux-selector disable-version --json --interpreter python --version 2.7
- Change version for an application:
For a specific application:
cloudlinux-selector set [--json] --interpreter python --user <str> --app-root <str> --new-version <str>For all applications that use specific Python version:
cloudlinux-selector change-version-multiple --json --interpreter python --from-version <str> --new-version <str>For multiple applications:
cloudlinux-selector change-version-multiple --json --interpreter python --data <pairs user:app-root as json> --new-version <str>
Examples
Change version for a specific application:
cloudlinux-selector set --json --interpreter python --user user1 --app-root apps_dir/app1 --new-version 2.7Change version for all applications that use version 2.7.15 to version 3.3.5:
cloudlinux-selector change-version-multiple --json --interpreter python --from-version 2.7 --new-version 3.3Change version of multiple application(s) and/or multiple users:
cloudlinux-selector change-version-multiple --json --interpreter python --data <pairs user:app-root as json> --new-version <str>
Example
cloudlinux-selector change-version-multiple --json --interpreter python --data [ {“user”: “user1”, “app_root”: “apps/app1”}, {“user”: “user2”, “app_root”: “apps/app1”} ] --new-version 2.7
Common output for all set commands:
in case of success:
{
  "result": "success",
  "timestamp": 1508666792.863358
}
in case of error:
{
  "result": "Some error message",
  "details" : "Traceback: ..." ,
  "context": {},
  "timestamp": 1508666792.863358
}
in case of warning:
{
  "result": "success",
  "warning" : "Some warning message" ,
  "context": {},
  "timestamp": 1508666792.863358
}
End user
Note
To start all users CLI commands use cagefs_enter command:
/bin/cagefs_enter.proxied /usr/sbin/cloudlinux-selector --json <other parameters>
Get config file for the user application:
cloudlinux-selector read-config [--json] --interpreter python [--user <str> | --domain <str>] --app-root <str> --config-file <name>JSON output:
{
  	"result": "success",
 "timestamp": 1508666792.863358
 	 “data”: “content of config file as Base64 encoded string”
}
Example:
cloudlinux-selector read-config --json --interpreter python --user user1 --app-root app_dir/app1 --config-file requirements.txtSave config file for user application:
cloudlinux-selector save-config [--json] --interpreter python [--user <str> | --domain <str>] --app-root <str> --config-file <path> --content <content of config file as Base64 encoded string>JSON output (the same as for all
setcommands):{ "result": "success", "timestamp": 1508666792.863358 }Example:
cloudlinux-selector save-config --json --interpreter python --user user1 --app-root app_dir/app1 --config-file requirements.txt --content VGh1ICAyIE5vdiAxMDo0MzoxMiBFRFQgMjAxNwo=Note
An output for all commands below is like in Hoster’s CLI, but filtered out by username.
Get a list of applications for a specific user:
cloudlinux-selector [get] [--json] --interpreter python [--user <str> | --domain <str>]Example:
cloudlinux-selector get --json --interpreter python --user user1Create user application:
cloudlinux-selector create [--json] --interpreter python [--user <str> | --domain <str>] --app-root <str> --app-uri <str> [--version <str>] [--startup-file <str>] [--entry-point <str>] [--env-vars <json string>]Example:
cloudlinux-selector create --json --interpreter python --app-root my_apps/app1 --domain xyz.com --app-uri apps/app1 --version 2.7 --startup-file run.py --entry-point appStart, restart, stop, and destroy user application:
cloudlinux-selector (start | restart | stop | destroy) [--json] --interpreter python [--user <str> | --domain <str>] --app-root <str>Example:
cloudlinux-selector start --json --interpreter python --user user1 --app-root my_apps/app1Set a custom path for Passenger log files:
Example:
cloudlinux-selector --json create --interpreter=python --version=3.3 --user=cltest1 --app-root=p_app2 --app-uri=p_app2_uri --passenger-log-file=/home/cltest1/passenger.logRemove a custom path for Passenger log files:
Example:
cloudlinux-selector --json set --interpreter=python --user=cltest1 --app-root=p_app1 --passenger-log-file=""Change properties for an application:
cloudlinux-selector set [--json] --interpreter python [--user <str> | --domain <str>] --app-root <str> [--app-mode <str>] [--new-app-root <str>] [--new-domain <str>] [--new-app-uri <str>] [--new-version <str>] [--startup-file <str>] [--entry-point <str>] [--env-vars <json string>] [--config-files <str>]Example:
cloudlinux-selector set --json --interpreter python --user user1 --app-root my_apps/app1 --app-mode production --new-app-root new_apps/new_app1 --new-domain new.xyz.com --new-app-uri new_apps/app1 --new-version 8 --startup-file new_app.js --env-vars { “var1” : “value1”, “var2” : “value2” } --config-files requirements.txt,reqs.txtRun
PIP installfor user application:cloudlinux-selector install-modules [--json] --interpreter python [--user <str> | --domain <str>] --app-root <str> --requirements-file <path>Example:
cloudlinux-selector install-modules --json --interpreter python --user user1 --app-root my_apps/app --requirements-file requirements.txtOptional: install or uninstall Python packages for user application:
cloudlinux-selector (install-modules|uninstall-modules) [--json] --interpreter python [--user <str> | --domain <str>] --app-root <str> --modules <module1[,module2...]>Example:
cloudlinux-selector install-modules --json --interpreter python --user user1 --app-root my_apps/app --modules json-annotate,termcolorOptional: run Python script in virtual environment of user application, arguments
<args>are passed to the script:cloudlinux-selector run-script [--json] --interpreter python [--user <str | --domain <str>>] --app-root <str> --script-name <str> [-- <args>...]Example:
cloudlinux-selector run-script --json --interpreter python --user user1 --app-root my_apps/app --script-name test_script -- --script_opt1 --script_opt2 script_arg1 script_arg2JSON output:
{ "result": "success", "timestamp": 1508666792.863358 “data”: “script output as Base64 encoded string” }
Ruby Selector
To create application run:
/usr/bin/selectorctl --interpreter=ruby --version=VERSION [--user=USER] [--print-summary] [--json] --create-webapp <FOLDER_NAME> <URI>
/usr/bin/selectorctl --interpreter=ruby [--user=USER] [--print-summary] [--json] --destroy-webapp <FOLDER_NAME>
/usr/bin/selectorctl --interpreter=ruby [--user=USER] [--print-summary] [--json] --relocate-webapp <FOLDER_NAME> <NEW_FOLDER_NAME>
To change application URI :
/usr/bin/selectorctl --interpreter=ruby [--user=USER] [--print-summary] [--json] --transit-webapp <FOLDER_NAME> <NEW_URI>
To change application interpreter version:
/usr/bin/selectorctl --interpreter=ruby [--user=USER] [--print-summary] [--json] --set-user-current --version=<NEW VERSION> <FOLDER_NAME>
To restart application:
selectorctl --interpreter ruby --user cltest1 --domain cltest1.com --restart-webapp testapp
selectorctl --interpreter=ruby --user=$USER -v 2.0
Node.js Selector
Below is a list of commands hoster and end user can run in a command line.
Hoster
Get information related to Node.js: default version, list of supported versions, status of Node.js Selector , list of users, their applications, etc:
cloudlinux-selector [get] [--json] --interpreter nodejs
JSON output for get command:
{
"selector_enabled": true | false,
"default_version": "6.11.3",
"result": "success",
"timestamp": 1508667174.220027
"cache_status": "ready" // or “updating” during automatic yum cache rebuild
"available_versions": { // begin of “versions”
"6.11.3" : { // begin of version "6.11.3"
"name_modifier": "",
"status": "enabled", // enabled, disabled, not_installed, installing, removing
“base_dir”: “/opt/alt/alt-nodejs6” // empty when version is not installed
“users”: { // begin of “users”
“user1”: { // begin of “user1”
“homedir”: “/home/user1”,
“applications”: { // begin of “applications”
“apps_dir/app1” : { // begin of application “apps_dir/app1”
“domain”: “cltest1.com”,
“app_uri”: “apps/my-app1”,
“app_mode” : “development”,
“startup_file” : “app.js”,
“app_status” : “started”, // ‘started’ or ‘stopped’
“config_files” : [
“package.json”,
“gruntfile.js”
],
“env_vars” : {
“var1” : “value1”,
“var2” : “value2”
},
}, // end of application “apps_dir/app1”
“apps_dir/app2” : { // begin of application “apps_dir/app2”
<< data for application “apps_dir/app2” (same structure as for application “apps_dir/app1” above) >>
}, // end of application “apps_dir/app2”
}, // end of “applications”
}, // end of “user1”
“user2”: { // begin of “user2”
<< data for user “user2” (same structure as for “user1” above) >>
}, // end of “user2”
}, // end of “users”
}, // end of version “6.11.3”
"8.21.5" : { // begin of version "8.21.5"
<< data for version "8.21.5" (same structure as for version “6.11.3” above) >>
}, // end of version “8.21.5”
}, // end of “versions”} // end of json
Set default version, supported versions, and status of Node.js Selector :
cloudlinux-selector set [--json] --interpreter nodejs (--selector-status <enabled,disabled> | --default-version <str> | --supported-versions <str>)
Note
Node.js Selector is disabled by default. If an available Node.js version is not installed Node.js Selector is always disabled and it is impossible to enable it.
To set default Node.js version, please use the following command (note that required Node.js version should be enabled):
cloudlinux-selector set --json --interpreter=nodejs --default-version=<ver>
Examples:
This command enables Node.js Selector :
cloudlinux-selector set --json --interpreter nodejs --selector-status enabled
This command sets default Node.js version as 6:
cloudlinux-selector set --json --interpreter nodejs --default-version 6
This command sets supported Node.js version as 8:
cloudlinux-selector set --json --interpreter nodejs --supported-versions='{"6": false, "8": true}'
Install required Node.js version:
cloudlinux-selector install-version --json --interpreter nodejs --version 8
Uninstall required Node.js version:
cloudlinux-selector uninstall-version --json --interpreter nodejs --version 8
Enable required Node.js version:
cloudlinux-selector enable-version --json --interpreter nodejs --version 8
Disable required Node.js version (note that it is impossible to disable default Node.js version):
cloudlinux-selector disable-version --json --interpreter nodejs --version 8
Change version for application(s):
cloudlinux-selector set [--json] --interpreter nodejs ((--user <str> | --domain <str>) --app-root <str> | --from-version <str>) --new-version <str>
Examples :
This command changes version for the specific application:
cloudlinux-selector set --json --interpreter nodejs --user user1 --app-root apps_dir/app1 --new-version 8
Common output for all set commands:
in case of success :
{ "result": "success", "timestamp": 1508666792.863358}
in case of error:
{ "result": "Some error message", "details" : "Traceback: ..." , "context": {}, "timestamp": 1508666792.863358}
in case of warning:
{ "result": "success", "warning" : "Some warning message" , "context": {}, "timestamp": 1508666792.863358}
To resolve issues related to install-version/uninstall-version commands (because they are running in the background) you may use this log file /var/log/cl-nodejs-last-yum.log It contains full yum output from the latest performed operation (install or uninstall) and it will be rewritten with each operation.
End user
options --user and --domain are mutually exclusive now.
Get config file for the user applications
cloudlinux-selector read-config [--json] --interpreter nodejs [(--user <str> | --domain <str>)] --app-root <str> --config-file <name>
JSON output:
{
"result": "success",
"timestamp": 1508666792.863358
"data": "content of config file as Base64 encoded string"
}
Example:
This command gets config file for user1 ’s application app1 :
cloudlinux-selector read-config --json --interpreter nodejs --user user1 --app-root app_dir/app1 --config-file package.json
cloudlinux-selector save-config [--json] --interpreter nodejs [(--user <str> | --domain <str>)] --app-root <str> --config-file <path> --content <content of config file as Base64 encoded string>
JSON output (the same as for all set commands):
{
  	"result": "success",
"timestamp": 1508666792.863358
}
Example:
This command saves config file for user1 ’s application app1 :
cloudlinux-selector save-config --json --interpreter nodejs --user user1 --app-root app_dir/app1 --config-file package.json --content VGh1ICAyIE5vdiAxMDo0MzoxMiBFRFQgMjAxNwo=
cloudlinux-selector [get] [--json] --interpreter nodejs [(--user <str> | --domain <str>)]
Example:
This command gets a list of applications for the user1 :
cloudlinux-selector get --json --interpreter nodejs --user user1
cloudlinux-selector create [--json] --interpreter nodejs [(--user <str> | --domain <str>)] --app-root <str> --app-uri <str> [--version <str>] [--app-mode <str>] [--startup-file <str>] [--env-vars <json string>]
Example:
This command creates user1 's application for the domain xyz.com :
cloudlinux-selector create --json --interpreter nodejs --user user1 --app-root my_apps/app1 --app-uri apps/app1
cloudlinux-selector create --json --interpreter nodejs --app-root my_apps/app1 --domain xyz.com --app-uri apps/app1
cloudlinux-selector (start | restart | stop | destroy) [--json] --interpreter nodejs [(--user <str> | --domain <str>)] --app-root <str>
Example: This command starts user1 's application:
cloudlinux-selector start --json --interpreter nodejs --user user1 --app-root my_apps/app1
cloudlinux-selector set [--json] --interpreter nodejs [(--user <str> | --domain <str>)] --app-root <str> [--app-mode <str>] [--new-app-root <str>] [--new-domain <str>] [--new-app-uri <str>] [--new-version <str>] [--startup-file <str>] [--env-vars <json string>]
Examples:
This command sets a custom path for Passenger log files:
cloudlinux-selector --json create --interpreter=nodejs --user=cltest1 --app-root=p_app2 --app-uri=p_app2_uri --passenger-log-file=/home/cltest1/passenger.log
This command removes a custom path for Passenger log files:
cloudlinux-selector --json set --interpreter=nodejs --user=cltest1 --app-root=p_app1 --passenger-log-file=""
Example 1: This command sets a production mode, new domain new.xyz.com , new Node.js version 8, new URI , new application root directory and new startup file for user1 application located on the domain xyz.com :
cloudlinux-selector set --json --interpreter nodejs --user user1 --app-root my_apps/app1 --mode production --new-app-root new_apps/new_app1 --new-domain new.xyz.com --new-app-uri new_apps/app1 --new-version 8 --startup-file new_app.js --env-vars '{ "var1" : "value1", "var2" : "value2" }'
Example 2:
cloudlinux-selector set --json --interpreter nodejs --domain xyz.com --app-root my_apps/app1 --mode production --new-app-root new_apps/new_app1 --new-domain new.xyz.com --new-app-uri new_apps/app1 --new-version 8 --startup-file new_app.js --env-vars '{ "var1" : "value1", "var2" : "value2" }'
Note
When changing Node.js version all replies from web application to get request will be checked in Node.js Selector (before and after version changing). HTTP response codes and MIME type are comparing. So, make sure application is available via http(s) at least locally.
Run npm install command for the user application
cloudlinux-selector install-modules [--json] --interpreter nodejs [(--user <str> | --domain <str>)] --app-root <str>
Example: This command runs npm install for user1 application:
cloudlinux-selector install-modules --json --interpreter nodejs --user user1 --app-root my_apps/app
Note
All replies from web application to get request will be checked in Node.js Selector (before and after modules installation). HTTP response codes and MIME type are comparing. So, make sure application is available via http(s) at least locally.
Run a script from package.json file of a user application, arguments args are passed to the script
cloudlinux-selector run-script [--json] --interpreter nodejs [(--user <str> | --domain <str>)] --app-root <str> --script-name <str> [-- <args>...]
Example:
cloudlinux-selector run-script --json --interpreter nodejs --user user1 --app-root my_apps/app --script-name test_script -- --script_opt1 --script_opt2 script_arg1 script_arg2
JSON output:
{
          "result": "success",
		  "timestamp": 1508666792.863358
		  "data": "script output as Base64 encoded string"
}
Activate virtual environment of NodeJS:
source <home_of_user>/nodevenv/<app_root>/<nodejs_version>/bin/activate
This command changes prompt to Example:
[newusr@test ~]$ source /home/newusr/nodevenv/newapp4/newapp3/8/bin/activate
[newapp4/newapp3 (8)]
[newusr@test ~]$
After activation user can use npm and node from a virtual environment without full paths.
Apache mod_lsapi PRO
switch_mod_lsapi is the command line tool used to manage mod_lsapi PRO.
It has the following syntax:
/usr/bin/switch_mod_lsapi [OPTIONS]
[OPTIONS] can be the main and an additional (for usage together with any other main option).
Main options
| Option | Description |
--setup | setup mod_lsapi configurations for Apache, including PHP handlers setup; create native lsphp (if it doesn't exist) by doing: cp /opt/alt/php56/usr/bin/lsphp /usr/local/bin/ * NOT supported for DirectAdmin |
--setup-light | setup PHP handlers only * supported for cPanel EasyApache 4 only |
--uninstall | uninstall mod_lsapi from Apache * supported for cPanel (EasyApache 3 and EasyApache 4), Plesk, and servers without control panel |
--enable-domain | enable mod_lsapi for individual domain * supported for cPanel EasyApache 3 only |
--disable-domain | disable mod_lsapi for individual domain * supported for cPanel EasyApache 3 only |
--enable-global | sets up mod_lsapi as a default way to serve PHP, making it enabled for all domains. Once that mode is enabled, you cannot disable mod_lsapi for an individual domain. * supported for cPanel only (EasyApache 3 and EasyApache 4) |
--disable-global | disable mod_lsapi as a default way to serve PHP, disabling mod_lsapi for all domains, including those selected earlier using --enable-domain * supported for cPanel EasyApache 3 only |
--build-native-lsphp | build native lsphp for cPanel EasyApache 3 * supported for cPanel EasyApache 3 only |
--build-native-lsphp-cust | build native lsphp for cPanel EasyApache 3 (with custom PHP source path) * supported for cPanel EasyApache 3 only |
--check-php | check PHP configuration * NOT supported for DirectAdmin |
--stat | return usage statistics in JSON format; the following statistics metrics are collected: • control panel name; • mod_lsapi version; • liblsapi version; • criu version and status; • whether mod_lsapi is enabled; • lsapi configuration options; • number of domains, that use mod_lsapi, per each installed PHP version including those set in PHP Selector (this metric is supported for cPanel EasyApache 4, Plesk and DirectAdmin) . |
Additional options
| Option | Description |
--verbose | switch verbose level on |
--force | switch force mode on |
The following table presents which [OPTIONS] are supported for various panels:
| No Control Panel | cPanel EA3 | cPanel EA4 | DirectAdmin | Plesk | InterWorx | ISPManager | |
setup | + | + | + | custombuild | + | + | + |
setup-light | - | - | + | - | - | - | - |
uninstall | + | + | + | custombuild | + | + | + |
enable-domain | - | + | - | - | - | - | - |
disable-domain | - | + | - | - | - | - | - |
enable-global | - | + | + | custombuild | - | - | - |
disable-global | - | + | - | custombuild | - | - | - |
build-native-lsphp | - | + | - | - | - | - | - |
build-native-lsphp-cust | - | + | - | - | - | - | - |
check-php | + | + | + | - | + | + | + |
verbose | + | + | + | - | + | + | + |
force | + | + | + | - | + | + | + |
stat | + *without domain info | + *without domain info | + | + | + | + *without domain info | + *without domain info |
Website Monitoring tool and Slow Site analyzer
The cloudlinux-ssa-manager utility
The cloudlinux-ssa-manager utility allows to manage Slow Site analyzer via CLI.
Usage
/usr/sbin/cloudlinux-ssa-manager [command] [--optional arguments]
Optional arguments:
-h, --help | show help message and exit |
Commands:
set-config | set the SSA configuration |
get-config | get the SSA configuration |
get-ssa-status | get a current status of SSA |
enable-ssa | enable SSA |
disable-ssa | disable SSA |
get-report | get the latest report |
You can use the -h, --help option with commands to get a full list of available optional arguments for each command.
Example of the /usr/sbin/cloudlinux-ssa-manager set-config --help command output:
/usr/sbin/cloudlinux-ssa-manager set-config --help
............

usage: cloudlinux-ssa-manager set-config [-h]
                                         [--domains-number DOMAINS_NUMBER]
                                         [--urls-number URLS_NUMBER]
                                         [--requests-duration REQUESTS_DURATION]
                                         [--request-number REQUEST_NUMBER]
                                         [--time TIME]
                                         [--correlation CORRELATION]
                                         [--correlation-coefficient CORRELATION_COEFFICIENT]
                                         [--ignore-list IGNORE_LIST]
optional arguments:
  -h, --help            show this help message and exit
  --domains-number DOMAINS_NUMBER
                        Size of TOP list for slow domains
  --urls-number URLS_NUMBER
                        Size of TOP list for slow urls
  --requests-duration REQUESTS_DURATION
                        The threshold value of request duration in seconds
  --request-number REQUEST_NUMBER
                        The threshold value of slow requests number in the
                        period of time to mark URL as a slow one
  --time TIME           Period of time in hours required to analyze these
                        requests
  --correlation CORRELATION
                        Flag to enable or disable correlation
  --correlation-coefficient CORRELATION_COEFFICIENT
                        The threshold value of correlation coefficient
  --ignore-list IGNORE_LIST
                        List of URLs or domains that should not be included in
                        the daily report
The wmt-api utility
The wmt-api utility allows to manage Website Monitoring tool via CLI.
Usage
/usr/share/web-monitoring-tool/wmtbin/wmt-api [command] [--optional arguments]
Optional arguments:
-h, --help | show help message and exit |
Commands:
config-change | set the WMT configuration using the JSON string that follows |
config-get | get the WMT configuration as JSON |
email-get | get WMT email from the config file |
report-generate | Generate a report JSON file |
send-clickhouse | Send the summary report to ClickHouse |
start | Start the WMT system |
status | Check the status of the WMT system |
stop | Stop the WMT system |
Example of the /usr/share/web-monitoring-tool/wmtbin/wmt-api command usage:
/usr/share/web-monitoring-tool/wmtbin/wmt-api -config-change "{\"ping_connections\":8,\"report_top\":5,\"report_email\":\"user@example.com\"}"
This way you can set all or only certain parameters.
X-Ray Autotracing
The cloudlinux-autotracing utility
The cloudlinux-autotracing utility allows to manage the X-Ray Autotracing via CLI.
Usage
/usr/sbin/cloudlinux-autotracing [command] [--optional arguments]
Commands:
enable | Enable X-Ray Autotracing |
disable | Disable X-Ray Autotracing |
status | Get current status of the X-Ray Autotracing |
Optional arguments:
-h, --help | Show help message and exit |
--all | Enable or disable for all users |
{username} | Enable/disable the specified user |
--list-disabled | Show list of disabled users |
You can use the -h, --help option with commands to get a full list of available optional arguments for each command.
Example usage:
Disable user1:
/usr/sbin/cloudlinux-autotracing disable user1
{"result": "success"}
Show list of disabled users:
/usr/sbin/cloudlinux-autotracing status --list-disabled
{"result": "success", "disabled_users": ["user1"]}
Enable all:
/usr/sbin/cloudlinux-autotracing enable --all
{"result": "success"}
Other CLI tools
cldeploy
sh cldeploy --help
Usage:
-h, --help | Print this message |
-k, --key <key> | Update your system to CloudLinux OS Shared with activation key |
-i, --byip | Update your system to CloudLinux OS Shared and register by IP |
-c, --uninstall | Convert CloudLinux OS Shared back to CentOS |
--serverurl | Use non-default registration server (default is https://xmlrpc.cln.cloudlinux.com/XMLRPC) |
--components-only | Install control panel components only |
--conversion-only | Do not install control panel components after converting |
--hostinglimits | Install mod_hostinglimits rpm |
--skip-kmod-check | Skip check for unsupported kmods |
--skip-version-check | Do not check for script updates |
--skip-registration | Don't register on CLN if already have access to CL repository |
--force-hybridize | Option allows to convert CloudLinux OS Shared 7 to CloudLinux OS Shared 7 Hybrid which has a newer kernel (from v1.61) |
--no-force-hybridize | Don't hybridize machine from CloudLinux 7 to CloudLinux 7 Hybrid automatically, even though machine has a new hardware |
--to-solo-edition | Convert to CloudLinux Solo edition (only allowed with --skip-registration option) |
--to-admin-edition | Convert to CloudLinux Admin edition (only allowed with --skip-registration option) |
--to-container-environment | Convert to CloudLinux which supports working inside containers |
--force-packages-installation | Automatically resolve dependencies and remove conflicting packages |
--allow-lower-version | Convert to lower minor version (Almalinux x.y to CL x.y-1) if current version (CL x.y) is not available |
The script will perform the following actions:
- Register server with CLN.
- Install CloudLinux OS Shared kernel, lve libraries, lve-utils, lve-stats and pam_lve packages.
- Attempt to detect control panel and do the following actions:
For cPanel:
- install mod_hostinglimits;
- install LVE Manager.
For DirectAdmin:
- recompile Apache to install mod_hostinglimits;
- install LVE Manager.
For Plesk, ISPManager & InterWorx:
- update httpd and install mod_hostinglimits;
- install LVE Manager.
To disable installation of LVE Manager and mod_hostinglimits, please use
--conversion-onlyoption.To disable installation of kernel & CLN registration, please use
--components-onlyoption.To install mod_hostinglimits only, use
--hostinglimitsoption.
Examples:
cldeploy --key xx-xxxxxx                            # convert RHEL/CentOS to CL by using activation key, install control panel components
cldeploy --key xx-xxxxxx --force-hybridize           # convert RHEL/CentOS 7 to CL7h by using activation key, install control panel components (from v1.61)
cldeploy --byip --conversion-only                   # convert RHEL/CentOS to CL by ip, don't install control panel components
cldeploy --components-only                          # install control panel components on already converted system
cldeploy --hostinglimits                            # update httpd and install mod_hostinglimits
lvectl
lvectl is the primary tool for LVE management. To use it, you have to have administrator access. lvectl is a part of lve-utils package.
lvectl syntax
Usage: lvectl command [lveid] [options]
Commands
apply | apply config settings to specified LVE |
apply all | apply config settings to all the LVEs |
apply-many | to apply LVE limits to multiple distinct LVEs (uids of users are read from stdin) |
set | set parameters for a LVE and/or create a LVE |
set-user | set parameters for a LVE and/or create a LVE using username instead of ID |
list | list loaded LVEs |
list-user | list loaded LVEs, display username instead of user id |
limits | show limits for loaded LVEs |
delete | delete LVE and set configuration for that LVE to defaults |
delete-user | delete LVE and set configuration for that user to defaults |
destroy | destroy LVE (configuration file remains unchanged) |
destroy all | destroy all LVE (configuration file remains unchanged) |
destroy-many | to destroy LVE limits to multiple distinct LVEs (uids of users are read from stdin) |
package-set | set LVE parameters for a package |
package-list | list LVE parameters for packages |
package-delete | delete LVE parameters for a package |
paneluserslimits | show current user's limits for control panel |
limit | limit PID into specified LVE. Parameters PID LVE_ID |
release | release PID from LVE. Parameters PID |
set-binary | add binary to be run inside LVE on execution |
del-binary | remove binary from being run inside LVE on execution |
list-binaries | list all binaries to be run inside LVE on execution |
load-binaries | load binaries (used on startup) from config file |
reload-binaries | re-load list of binaries from config file |
help (-h) | show this message |
version (-v) | version number |
lve-version | LVE version number |
set-reseller | create LVE container and set LVE parameters for a reseller |
set-reseller-default | set default limits for resellers users |
remove-reseller | delete LVE container and the record in the config, move LVE containers to the host container |
Options
--enter-count | enable limit for enters count (by default disabled), use only with command "limit". Supported in lve-utils-6.1.2-1 or later. |
--io-and-memory | enable limit for IO and memory (by default disabled), use only with command "limit". Supported in lve-utils-6.1.2-1 or later. |
--cpu=N | limit CPU usage; (deprecated. Use --speed) |
--speed=N% | limit CPU usage in percentage; 100% is one core |
--speed=Nmhz\ghz | limit CPU usage in mhz\ghz |
--ncpu=N | limit VCPU usage (deprecated) |
--io=N | define io limits (KB/s) |
--nproc=N | limit number of processes |
--pmem=N | limit physical memory usage for applications inside LVE |
--iops=N | limit io per second |
--mem=N | mem alias for vmem (deprecated) |
--vmem=N | limit virtual memory for applications inside LVE |
--maxEntryProcs=N | limit number of entry processes |
--save | save configuration settings (use with set) (deprecated) |
--save-all-parameters | save all parameters even if they match with defaults settings |
--json | returns result of command json formatted |
--unlimited | set all limits to unlimited |
--save-username | save username in the config file. This parameter is used in conjunction with set-user |
Examples
Reset all LVEs settings based on configuration in
/etc/container/ve.cfg:lvectl apply allSet new default CPU & Physical memory limit:
lvectl set default --speed=100% --pmem=256mReset all LVE's killing processes inside them:
lvectl destroy allShow list of LVEs and their limits:
lvectl list
lveps
lveps tool shows information about running LVEs, processes and threads belonging to them, CPU/memory/IO usage consumed by LVEs and their individual processes/threads. LVE is only reported if it is considered active (at least one thread belongs to that LVE or was running during measurement in dynamic mode).
Usage:
lveps [-p] [-n] [-o <fmt1:width1,...>] [-d] [-c <time>] [-s <style>] [-t] [-h]
Options:
-p | to print per-process/per-thread statistics |
-n | to print LVE ID instead of username |
-o | to use formatted output (fmt=id,ep,pid,tid,cpu,mem,io) |
-d | to show dynamic cpu usage instead of total cpu usage |
-c | to calculate average cpu usage for <time> seconds (used with -d) |
-r | to run under realtime priority for more accuracy (needs privileges) |
-s | to sort LVEs in output (cpu, process, thread, mem, io) |
-t | to run in the top-mode |
-h | to print this brief help message |
Command like lveps -p will display processes running inside 'active' LVEs.
| CPU | The number of seconds LVE/process/thread has been running (each CPU /core is counted separately), or the average CPU load (100% is all CPU resources) if used with -d. |
| MEM | The number of megabytes of resident memory in use by LVE/process/thread (shared memory is not included). |
| IO | The number of kilobytes read and written in sum by LVE, or kb/sec if used with -d. |
| ID | LVE ID or username. |
| EP | The number of entry processes inside LVE. |
| COM | Command name for this process. |
| PID | PID of the process. |
| PNO | The number of processes belonging to the LVE. |
| TID | TID of the thread. |
| TNO | The number of threads belonging to the LVE. |
| DO | The number of disk operations belonging to the LVE from the time it was created. |
| DT | Total amount of disk transfer in megabytes from LVE creation time. |
| IOPS | The number of I/O operations per second |
lvetop
lvetop utility allows to monitor LVE usage:
ID        EP PNO TNO SPEED MEM  IO   IPOS
testuser1 0  1   1   0%    7    0    0
testuser2 0  0   0   5%    0    3    0
testuser3 1  2   2   0%    102  2727 0
testuser4 0  1   1   0%    12   84   1
testuser5 0  2   2   1%    52   0    0
lvetop fields:
ID | user name if LVE id matches user id in /etc/passwd, or LVE id |
EP | number of entry processes (concurrent scripts executed) |
PNO | number of processes within LVE |
TNO | number of threads within LVE |
CPU | CPU usage by LVE, relative to total CPU resources of the server |
MEM | Memory usage by LVE, in KB |
I/O | I/O usage |
IOPS | number of read/write operations per second |
cldetect
Note
lve-utils 1.2-10+
cldetect is used to detect installed software, and adjust CloudLinux OS Shared options accordingly.
Usage:
/usr/bin/cldetect [--options]
cldetect -h/-h/--help | show this message |
--detect-cp | prints control panel and its version (CP_NAME,CP_VERSION) |
--detect-cp-full | prints control panel, version and panel specific data (CP_NAME,CP_VERSION,...). Specific data: for ISP Manager5 - Master/Node |
--detect-cp-nameonly | prints control panel name (CP_NAME) |
--get-admin-email | prints control panel admin email (CP_ADMIN_EMAIL) |
--cxs-installed | check if CXS is installed. Returns 0 if installed, 1 otherwise |
--cpanel-suphp-enabled | check if suPHP is enabled in cPanel.Returns 0 if enabled, 1 otherwise |
--detect-litespeed | check if LiteSpeed is installed. Returns 0 if installed, 1 otherwise |
--detect-postgresql | check if PostGreSQL is installed. Returns 0 if installed, 1 otherwise |
--print-apache-gid | prints current apache gid |
--print-da-admin | prints DirectAdmin admin user |
--set-securelinks-gid | changes /etc/sysctl.conf if apache gid != 48 (default) |
--set-nagios | do some adjustments to make nagios work correctly if it's installed. Called as a part of --setup-supergids |
--setup-supergids | do some adjustments to make special users/software (nagios, cPanel’s mailman) work correctly if it is installed to the system |
--cl-setup | check if CloudLinux OS Shared is installing. Returns 0 if installing, 1 otherwise |
--update-license | updates license |
--update-new-key | updates license with new key |
--check-license | check license. Returns OK if license is not older than 3 days, error message otherwise |
-q | check license. Returns 0 if license is not older than 3 days, 1 otherwise |
--no-valid-license-screen | returns no valid license found screen |
--license-out-of-date-email | returns License out of Date Email. |
--check-openvz | returns enviroment id |
clsupergid auto-configuration
Each time lve-utils package is installed or upgraded it does some automatic system re-configuration to make some software (like nagios) work correctly, if it’s installed, by calling cldetect --setup-supergids command.
Starting from lve-utils 3.0-21 a behaviour of cldetect --set-nagios (now, it’s a part of cldetect --setup-supergids) command slightly changed.
| Old behavior | New behavior | |
| If fs.proc_super_gid is 0 (which means it’s not configured) or it’s set to some GID that doesn’t exist in the system. | Command will set sysctl fs.proc_super_gid to point to Nagios GID. | Command will create special clsupergid group, setup sysctl fs.proc_super_gid to point to it’s GID and add Nagios user to this group. If no such user exists, then no actions with the group will be done. |
If fs.proc_super_gid was configured by an admin to some existing group, the command will just add Nagios user to this group.
cldiag
cldiag utility is included in lve-utils package and is intended for:
- server diagnostics performed by a server administrator for detecting the most common errors in the configuration or software operation;
- the focused check of the servers for typical errors performed by the support engineers before proceeding to the detailed analysis of the customer tickets;
- servers automatic check by cron with the following generation of the reports and email them to the server administrator.
- Set option
ENABLE_CLDIAGtofalsein config/etc/sysconfig/cloudlinuxif you want to disable automatic check by cron permanently - Use the cldiag key
--disable-cron-checkersfor disabling separate checkers if you want to disable only some checkers (lve-utils >= 4.2.18-1) - A default email is
root@localhost.localdomain. Note that the settings of the mail server can change the final email.
- Set option
You can change the email in the following ways:
- In your control panel by changing the mail server settings
- By changing the
/etc/sysconfig/cloudlinuxconfig:- Set the desired email instead of the default CP value in the
EMAILoption - Set the
CPvalue in theEMAILoption in thelicense_checksection. Add an option with the path to the panel script for receiving emails:{PANEL_NAME}_getemail_script=/path/to/getemail_script)
{PANEL_NAME}is the name of the panel from thecldetect --detect-cp-namecommand output.- If there is no panel script, the default email (
root@localhost.localdomain) will be used. - The
/path/to/getemail_scriptfile should be executable and output to stdout the admin email to which an email with checks results will be sent. Note that the settings of the mail server can change the final email.
- Set the desired email instead of the default CP value in the
In all cases, for the negative checker result, the exit code will be > 0 (at the moment it will be equal to the number of failed checkers).
All the checkers support additional --json option with the unified output in an appropriate format.
For example:
cldiag --symlinksifowner --json

{"total_errors": 0, "Check fs.enforce_symlinksifowner is correctly enabled in /etc/sysctl.conf": {"res": "OK", "msg": "fs.enforce_symlinksifowner = 1"}}
Each checker returns a typical result with the name of the check performed (brief description), one of the possible statuses of its execution, and detailed information on its fail or success.
For example:
Check fs.enforce_symlinksifowner is correctly enabled in /etc/sysctl.conf:

OK: fs.enforce_symlinksifowner = 1

Check suexec has cagefs jail:

SKIPPED: SuEXEC is not enabled
Possible checkers results:
OK- the check succeeded.FAILED- the check revealed a problem.SKIPPED- the check was skipped as it made no sense in the actual environment (e.g. wrong control panel) or it could not be executed for some reason (e.g. no users with enabled CageFS found). Such result doesn’t mean there is a problem and can be considered as a positive.INTERNAL_TEST_ERROR- the check has failed because of a problem in the checker itself. Please report such problems using https://cloudlinux.zendesk.com/agent/.
The utility includes several built-in checkers, and can also import and run checkers from other utilities.
Currently implemented checkers:
diag-cp
Checks control panel and its configuration (for DirectAdmin only).
Checking control panel availability, thereby detecting it with our code. Displaying control panel name and version. Also, for DirectAdmin, checking if CloudLinux OS Shared support is enabled in its config.
Fails if /usr/local/directadmin/custombuild/options.conf does not contain cloudlinux=yes line (for DirectAdmin control panel).
symlinksifowner
Checks fs.enforce_symlinksifowner is correctly enabled in /etc/sysctl.conf.
Checking specified kernel setup described in this docs section for deprecated value and displaying its current value.
Fails if /proc/sys/fs/enforce_symlinksifowner contains value 2 (it is deprecated and can cause issues for the system operation).
check-suexec
Checks suexec has cagefs jail.
In case if CageFS is installed and SuEXEC is on, checking if CageFS is enabled for SuEXEC.
Fails if CageFS is not enabled for suexec binary.
check-suphp
Checks suphp has cagefs jail.
In case if CageFS is installed and SuPHP is on, checking if CageFS is enabled for SuPHP.
Fails if CageFS is not enabled for suphp binary.
check-usepam
Checks usepam setting in /usr/sbin/sshd -T output.
Checking if /usr/sbin/sshd -T output contains usepam yes line, which is required for pam_lve correct work with sshd.
Fails if /usr/sbin/sshd -T output contains usepam no. You could specify UsePAM yes in /etc/ssh/sshd_config.
Note
Cldiag checks /usr/sbin/sshd -T output in lve-utils >= 6.4.8. Lower versions check whether /etc/ssh/sshd_config file contains UsePAM yes line.
check-symlinkowngid
Checks fs.symlinkown_gid.
First checking if user Apache is available in the system (on some panels users httpd or nobody with special GID are present instead of Apache, they are detected correctly as well). Then, if such user exists, checking that his GID equals to the one specified in sysctl or that this user belongs to this supplemental group. If these conditions are met, then the protection effect described in this docs section is applied to this user, and the appropriate message will be displayed.
Fails if Apache user is not in the group specified in /proc/sys/fs/symlinkown_gid.
check-cpanel-packages
Checks existence of all user's packages (cPanel only)
Reading PLAN= for all users from /var/cpanel/users and checking if all of them are present in /var/cpanel/packages and if not, then displaying them in pairs like user: plan. default and undefined packages are excluded from the check.
Fails if users from /var/cpanel/users/ directory have non-existing packages (packages do not exist in /var/cpanel/packages/ directory, except for undefined and default).
check-defaults-cfg
Checks /etc/cl.selector/default.cfg.
Checking that if this config exists, the default PHP version is not disabled in it. Also performing minimal syntax checks for PHP modules settings and displaying the incorrect.
Fails if there are some problems in /etc/cl.selector/default.cfg found.
Possible reasons for failure:
- Default version is undefined, which means
/etc/cl.selector/default.cfgfile does not contain section [versions] with the defined default version. - Default PHP version is disabled.
check-cagefs
All checks for CageFS are described separately in this docs section and their start from cagefsctl utility is completely equivalent to the start from cldiag and is designed only for a better experience.
This checker includes a set of CageFS sub-checkers, failure of one (or more) of them causes general checker failure.
check-php-conf
Checks /etc/cl.selector/php.conf.
Checking the config syntax for acceptable blocks and directives.
Fails if /etc/cl.selector/php.conf has incorrect format.
File contains an invalid parameter (valid parameters:
Directive,Default,Type,Comment,Range,Remark).File contains an invalid setting for the parameter
Type(valid settings for theTypeparameter:value,list,bool)
check-phpselector
Checks compatibility for the PHP Selector
Detecting which PHP handler has been configured on the server and checking its compatibility with the CloudLinux OS Shared PHP Selector according to this table and displaying the corresponding message with the link to the documentation in case of a problem detected. No checks are performed for EasyApache3.
Failure reasons:
- The installed
mod_ruidpackage is incompatible with the PHP Selector mod_suexecis not installedmod_suphpis not installed- Absence of the
/usr/local/lsws/conf/httpd_config.xmlfile (only for LiteSpeed server)
Note
The following checkers are available in lve-utils >= 3.1.2
check-lve-limits
Checks the validity of LVE limits on the server.
See this page for detailed description.
check-rpmdb
Warning
This checker was removed from the cldiag utility as cldiag --check-rpmdb can in some cases hang up during rpmdb check, which can brake access to the database for rpm/yum utilities.
check-hidepid
A new checker check-hidepid is available starting from lve-utils-4.2.18-1 and later. It checks if CageFS is installed and if /proc is mounted without the hidepid=2 parameter.
If CageFS is not installed,
check-hidepidskips and outputs the following:Check mount with hidepid=2 option: SKIPPED: Cagefs is not installedIf
check-hidepidtriggers and finds an issue, it outputs the following:Check mount with hidepid=2 option: FAILED: Details: hidepid protection disabled. Please, mount system with hidepid=2 for better security. Read more about hidepid option here: https://docs.cloudlinux.com/shared/cloudlinux_os_kernel/#remounting-procfs-with-hidepid-optionIf
check-hidepidtriggers and it's OK, it outputs the following:Check mount with hidepid=2 option: OK: hidepid protection enabled
check-jwt-token
This new checker is available starting from LVE-Utils 4.2.21-2
Checks the validity and presence of the JWT token which is required for correct work of client part of Centralized Monitoring.
Failure reasons:
- The JWT token is absent in path
/etc/sysconfig/rhn/jwt.token - The JWT token is malformed
- The JWT token is expired.
- The issuer of JWT token is invalid.
In all cases try running rhn_check for getting a new token.
check-cm-all
This new checker is available starting from LVE-Utils 4.2.21-2
Checks the things on a server of client which are required for correct work of client part of Centralized Monitoring:
- Checks the validity and presence of JWT token
- Checks that service
cl_plus_senderis present, enabled and active - Checks that service
node_exporteris present, enabled and active - Checks that service
lvestatsis present, enabled and active - Checks that RPM packages
cl-end-server-toolsandcl-node-exporterare installed
all
Performs diagnostic checks from the list:
- check_cp_diag
- check_symlinksifowner
- check_suexec
- check_suphp
- check_use_pam
- check_symlinkowngid
- check_existence_of_all_users_packages
- check_phpselector
- check_defaults_cfg
- check_php_conf
- check_lve_limits
- check_hidepid
- check_cagefs_partition_disk_quota
- fake_cagefs_checker
generate-email
Performs diagnostic checks (from the list above) and generates HTML report sent to the administrator's email.
cron-check
Performs the same diagnostic checks as generate-email but with considering the ENABLE_CLDIAG option in the /etc/sysconfig/cloudlinux.
Performs diagnostic checks from the list:
- check_symlinksifowner
- check_use_pam
- check_symlinkowngid
- check_existence_of_all_users_packages
- check_lve_limits
- check_hidepid
- check_cagefs_partition_disk_quota
- check_jwt_token
- check_cl_plus_sender_service
- check_node_exporter_service
- check_cmt_packages
- check_lvestats_service
doctor
Note
Available starting from lve-utils version 6.3.9-1.
This option can be used instead of the following command:
wget -qq -O - https://repo.cloudlinux.com/cloudlinux/cldoctor/cldoctor.sh | bash
If this option is provided cldoctor script will be downloaded to a temp directory and executed by cldiag. Also the report will be automatically sent to our support team.
cloudlinux-config
cloudlinux-config utility shows/sets various parameters related to LVE Manager UI, MySQL Governor and faults notifications for LVE-Stats 2
Usage:
cloudlinux-config get [--json] [--for-reseller resname ]
cloudlinux-config set [--json] --data <str> [--for-reseller resname ]
cloudlinux-config set [--json] --reset-inodes-limit
Commands:
get | Shows the values of all supported parameters |
set | Sets values for supported parameters |
Options
--json | Sets/returns values in json format |
--data | Sets values from the data string that follows |
--for-reseller | Sets/limits the output only to the data related to reseller resname |
--reset-inodes-limit | Resets inode limits (in case disk quota breaks) |
JSON data structure
All options are enclosed inside options (Level 0) string. All options are enclosed in " ", while values come as is. Here's an example:
'{"options":{"L1_option1":value1, "L1_option2":value2}}'
Each Level1 option can have nested Level2 options specified using the same syntax, the same goes for Level2 and Level3 options respectively.
LVE-Stats 2 faults notification settings
| Level1 | Level2 | Level3 | Level4 | Possible values | Description |
faultsNotification | faultsToInclude | concurrentConnections | true/false | Include concurrent connection value in notification emails | |
faultsNotification | faultsToInclude | cpu | true/false | Include CPU consumption value in notification emails | |
faultsNotification | faultsToInclude | io | true/false | Include IO value in notification emails | |
faultsNotification | faultsToInclude | iops | true/false | Include IOPS value in notification emails | |
faultsNotification | faultsToInclude | mem | true/false | Include RAM consumption value in notification emails | |
faultsNotification | faultsToInclude | nproc | true/false | Include number of processes value in notification emails | |
faultsNotification | fminimumNumberOfFaultsToNotify | admin | N | The minimum number of faults to notify for admin | |
faultsNotification | fminimumNumberOfFaultsToNotify | user | N | The minimum number of faults to notify for users | |
faultsNotification | fminimumNumberOfFaultsToNotify | reseller * | N | The minimum number of faults to notify for reseller | |
faultsNotification | fminimumNumberOfFaultsToNotify | customer * | N | The minimum number of faults to notify for reseller's customers | |
faultsNotification | notify | admin | period | N | The period of faults notifications for admin |
faultsNotification | notify | admin | unitOfTime | minutes/hours/days | Time units of period of faults notifications for admin |
faultsNotification | notify | user | period | N | The period of faults notifications for users |
faultsNotification | notify | user | unitOfTime | minutes/hours/days | Time units of period of faults notifications for users |
faultsNotification | notify | reseller * | period | N | The period of faults notifications for resellers |
faultsNotification | notify | reseller * | unitOfTime | minutes/hours/days | Time units of period of faults notifications for resellers |
faultsNotification | notify | customer * | period | N | The period of faults notifications for reseller's customers |
faultsNotification | notify | customer* | unitOfTime | minutes/hours/days | Time units of period of faults notifications for reseller's customers |
faultsNotification | notifyAdmin | true/false | Send faults notifications to admin | ||
faultsNotification | notifyResellerCustomers | true/false | Send faults notification to reseller users | ||
faultsNotification | notifyResellerOnCustomers * | true/false | Send users' faults notifications to the respective reseller | ||
faultsNotification | notifyReseller * | true/false | Send faults notification to reseller | ||
faultsNotification | notifyCustomers | true/false | Send faults notifications to users | ||
faultsNotification | notifyResellers | true/false | Send faults notification to resellers | ||
faultsNotification | email | notifyCharset** | utf-8/null | Set charset used in email | |
faultsNotification | email | notifyFromEmail** | admin@email.com/null | Set email to notify from | |
faultsNotification | email | notifySubject** | Subject/null | Set email subject | |
faultsNotification | email | reportAdminEmail** | admin@email.com/null | Set admin email for notifications |
Note
To reset options marked with ** set null.
Note
Options marked with * are for reseller use only
MySQL Governor settings
| Level1 | Level2 | Level3 | Level4 | Possible values | Description |
mySQLGovSettings | errorLog | level | DEBUG/ERROR | Sets error log level | |
mySQLGovSettings | errorLog | logPath | /var/log/dbgovernor-error.log | Sets error log destination file | |
mySQLGovSettings | gatherDataForDetailedStats | true/false | Enables gathering data for detailed statistics | ||
mySQLGovSettings | logRestrictedUsersQueries | true/false | Enables logging of restricted user queries | ||
mySQLGovSettings | modeOfOperation | off/single/abusers/all | Sets the mode of operation | ||
mySQLGovSettings | restrictLog | format | SHORT/MEDIUM/LONG/VERYLONG | Sets the format for restrict log | |
mySQLGovSettings | restrictLog | logPath | /var/log/dbgovernor-restrict.log | Sets the format for restrict log | |
mySQLGovSettings | restrictType | mode | period/limit | Sets the restriction mode | |
mySQLGovSettings | restrictType | unlimit | period | N | Sets the restriction expiration period |
mySQLGovSettings | restrictType | unlimit | unitOfTime | seconds/minutes/hours/days | Sets the restriction expiration period units of time |
mySQLGovSettings | restrictedTimePeriods | level1 | period | N | Sets L1 restriction time period |
mySQLGovSettings | restrictedTimePeriods | level1 | unitOfTime | seconds/minutes/hours/days | Sets L1 restriction time period units of time |
mySQLGovSettings | restrictedTimePeriods | level2 | period | N | Sets L2 restriction time period |
mySQLGovSettings | restrictedTimePeriods | level2 | unitOfTime | seconds/minutes/hours/days | Sets L2 restriction time period units of time |
mySQLGovSettings | restrictedTimePeriods | level3 | period | N | Sets L3 restriction time period |
mySQLGovSettings | restrictedTimePeriods | level3 | unitOfTime | seconds/minutes/hours/days | Sets L3 restriction time period units of time |
mySQLGovSettings | restrictedTimePeriods | level4 | period | N | Sets L4 restriction time period |
mySQLGovSettings | restrictedTimePeriods | level4 | unitOfTime | seconds/minutes/hours/days | Sets L4 restriction time period units of time |
mySQLGovSettings | restrictedTimePeriods | timeout | period | N | Sets restriction time period timeout |
mySQLGovSettings | restrictedTimePeriods | timeout | unitOfTime | seconds/minutes/hours/days | Sets L1 restriction time period timeout units of time |
mySQLGovSettings | scriptPath | /path/to/script | Path to script to be triggered when account is restricted | ||
mySQLGovSettings | slowQueries | kill | true/false | Enables killing of slow queries | |
mySQLGovSettings | slowQueries | logPath | /path/to/sqkill.log | Sets the path to slow query kill log file | |
mySQLGovSettings | slowQueries | timeout | N | Time to kill slow SELECT queries for account (seconds) | |
mySQLGovSettings | userMaxConnections | N | Sets the maximum number of user connections to database |
LVE Manager UI settings
| Level1 | Level2 | Possible values | Description |
inodeLimits | showUserInodesUsage | true/false | Show end user inode usage |
uiSettings | hideLVEUserStat | true/false | Hide LVE end user usage statistic |
uiSettings | hidePHPextensions | true/false | Hide PHP extension selection |
uiSettings | hidePythonApp | true/false | Hide Python App in web-interface |
uiSettings | hideRubyApp | true/false | Hide Ruby App in web-interface |
Examples
- display Python/Ruby Selector in User UI (cPanel)
cloudlinux-config set --json --data '{"options":{"uiSettings":{"hideRubyApp":false, "hidePythonApp":false}}}'
cl-quota
- General provisions
- Setting limits and integration with panel packages
- Limits inheritance
- Caching and synchronizing the limits
- Quotas DB file
- CLI options/examples
cl-quota utility is designed to control disk quotas and provides:
Setting user and package limits.
Integration with panel packages.
Limits synchronization.
Automatic inheritance of panel limits to all appropriate users.
Note
cl-quota works only with inodes soft/hard limits (soft/hard file limits in setquota/repquota utilities terminology). Block limits are not controlled by cl-quota utility in any way, they are not taken into account and do not affect the data that they issue. That is why hereinafter it is the inode limits that are implied by the word “limits”.
General provisions
cl-quota utility never sets/reads limits directly in the system, it uses standard setquota/repquota utilities included into the quota package for this purpose.
cl-quota will not work in the following cases:
setquota/repquota are missing or working incorrectly;
the quotas are not configured in the system.
cl-quota only performs the minimal diagnostics of quota related errors:
verifies the availability of setquota/repquota utilities on the disk;
verifies if quotas are activated for a specified user (with a separate command), see below.
quota package which contains the required setquota/repquota utilities, is not included in lvemanager package dependencies by default, and quotas activation is a long process which sometimes depends on the panel used, therefore, all the steps on quotas configuration and activation must be carried out by yourself, cl-quota does not perform these actions.
Error messages sent back to the console are extremely rare, to receive error messages use the command:
cat /var/log/messages | grep clquota
Note
You should not set soft limit higher than hard limit. cl-quota does not control it in any way, but in some cases, the system can ban such limits combination and they won’t be set or will be set in some other way.
Setting limits and integration with panel packages
cl-quota utility allows setting inodes limits for users of the system.
cl-quota integrates with the panels through a standard mechanism - Integrating LVE Limits with Packages.
Panel users are such users whose UIDs are issued by the above panel integration mechanism. The list of panel packages and the information on the user's affiliation to a particular package is obtained from there as well.
When installing/reading the limits, the following peculiarities are applied:
When displaying quotas, cl-quota displays information about the limits of all users - system and panel. No filter applied. The actual limit values are always displayed.
Limit value -1 for the packages (see below) is displayed as dash (-).
If cl-quota is running under root , it will display the limits returned by repquota utility with no changes. If it is running under some other user, it will return data from a special cache file, see Quotas cache and synchronization.
Limits setting only works for panel users, for all other users limits are not set (the command is ignored). The only exception - uid=0 . The limits are never set for the root user (uid=0) , but they are stored in DB file and are used by inheritance mechanism. See Limits Inheritance.
Hard and soft limits are completely independent, сl-quota does not apply any interdependencies to them. Setting only one of them (any) is acceptable, the other one will not change.
cl-quota utility also supports package limits set/read. When setting package limits, they are set for all users of a particular package except for those whose limits are set individually. See also Limits Inheritance.
Any positive numbers are allowed as limit values. cl-quota neither controls nor changes these values except the following cases:
negative values are taken modulo;
fractional values are converted to integers by discarding the fractional part;
if the transferred value can not be turned into a number (for example, 67wg76), it is completely ignored and the limit is not set at all.
Then these values are transmitted directly to setquota system utility for the actual setting of the limits.
Thus cl-quota has two limit values, which are processed in a special way:
0: Means inheritance of the limit from the package where the user is located, or from uid=0 . See also Limits inheritance for more detailed information.
-1: The real limits are set to 0, which means no limits, literally "unlimited". This is legit both for individual and for package limits. Limit value -1 is stored in the database as well as any other but is never displayed.
You can use the words “default” and “unlimited” instead of 0 and -1 respectively, they are fully interchangeable. See also DB File and CLI Options.
Individual and package limits are always saved in DB file. Limits from there are used when synchronizing quotas . Please find more details in Limits Synchronization.
Also, find detailed information on DB file itself in Quotas DB File section.
Utility options are described in CLI Options section.
Limits inheritance
When setting package limits to the package users, the inheritance principle is applied. It means that:
If no individual limit is set to a user, then he inherits the limits of the package he belongs to.
If no limit is set to a package (=0), then the users inherit uid=0 limits.
Caching and synchronizing the limits
Any user of the system (including panel users) is always created with limits equal to 0. To assign him the limits of the corresponding package, the synchronization process is used.
During the synchronization, cl-quota utility reads the database file and sets the limits from it to the users and packages specified therein. This mode is designed to set the correct limits for the new users and to restore them for the existing ones. When recovering, the current limits are neither read nor analyzed.
Caching - is writing current limits to /etc/container/cl-quotas.cache file. If cl-quota is not started from the root for reading the current limits, then it returns data from this file.
When installing LVE Manager package, a special cron job is installed, which performs synchronization and caching ( cl-quota -YC ) every 5 minutes. Therefore, the correct limits will be set for the user within 5 minutes from the moment of its creation.
Caching and synchronization can also be performed separately, see "CLI Options" section.
To disable this feature add to the config file /etc/sysconfig/cloudlinux.
Quotas DB file
All cl-quota limits settings are stored in along with the UID or the name of the package the limit was set for.
When saving the limits to a file, the following rules are applied:
If a limit value is non-integer or non-numeric, then the rules from "Setting limits and integrating with panel packages" section are applied. The assigned value is saved to the file.
Limits are always saved in pairs, no matter if only one limit was set or both. The pair looks as follows: soft_limit:hard_limit .
The values 0 and -1, when having a predetermined meaning, are saved as is without any transformations.
The words “default” and “unlimited” are saved as 0 and -1 respectively.
If both limits for a user/package were set as 0, then such user/package is not saved in the file, and if it was previously there - it will be removed. Therefore, if a user/package is not mentioned in the file, then all its limits are inherited. See Limits Inheritance section.
The lists of panel users, packages, and user-package correspondence are not saved anywhere, this information is always subtracted from the panel.
Example:
/etc/container/cl-quotas.dat
[users]
0 = 1000:2000
500 = -1:-1
958 = 0:20000
[packages]
pack1 = 5000:-1
uid=0 limits are set to 1000:2000 - default for all panel users
Both limits are set as unlimited for a user with uid=500, which means that its real limits will always be 0:0. The package limits do not affect this user.
Soft limit of the user with uid=958 is inherited (0 means inheritance), his hard limit is set to 20000 and it will not depend on the package limits or uid=0 limits.
Limits 5000:-1 are set for pack1 package, therefore its real limits are: soft_limit=5000 and hard_limit=0 (unlimited).
The users of pack1 package will get pack1 limits (5000:-1), the users of all the rest of the packages will get the limits of uid=0 because no limits are set for them. Exceptions: uid=500 and 958. uid=500 has both limits set individually, and uid=958 inherits only soft limits.
CLI options/examples
cl-quotа utility has the following command line options:
-u | --user                  : specifies the user
-U | --user-id              : specifies the user ID
-S | --soft-limit            : sets the soft limit for a user. Pass 0 or 'default' to set package default limit. Pass -1 or 'unlimited' to cancel limit
-H | --hard-limit            : sets the hard limit for a user. Pass 0 or 'default' to set package default limit. Pass -1 or 'unlimited' to cancel limit
-V | --csv                  : returns data as comma separated values
-p | --package              : specifies a package to set or get limits
-P | --package-limits        : prints package limits
-a | --all-package-limits : prints all package limits (including packages without limits)
-Y | --sync                  : synchronizes packages and users limits with the database
-C | --cache-content        : cache quota data to a file the database
-F | --force                : save user quotas even when they are equal to defaults
       --check                : check if quotas is enabled/activated/suported; if disabled show diagnostic information; using with --user or --user-id options
--user and --user-id options are designed to specify user whose limits are required to be set or displayed. --user specifies user name, --user-id - uid . It is acceptable to specify one or another.
--package - specifies package name.
--soft-limit , --hard-limit - specify soft and hard limits values respectively. It is acceptable to use words “default” or “unlimited” as limit value.
--csv - displays limits in csv format (instead of data formatted in the table).
--package-limits - displaying the limits of the packages created by the panel admin.
--all-package-limits - displaying the limits of all the packages, including the ones created by the resellers and packages with no users.
--sync - synchronizes users quotas and packages with the database.
--cache-contents - performs quotas caching.
--force - saving user quotas even if they are equal to the current.
--check - performs diagnostics for a specified user. Can be used only when a user is specified (along with --user / --user-id ).
Examples:
- Reading current user limits:
cl-quota
cl-quota --csv
- Reading current package limits:
cl-quota --package-limits
cl-quota --all-package-limits
cl-quota --package-limits --csv
cl-quota --all-package-limits --csv
- Specifying limits for a user:
cl-quota --user-id=500 --soft-limit=0 --hard-limit=0
cl-quota --user-id=500 --soft-limit=unlimited
cl-quota --user-id=500 --soft-limit=0 --hard-limit=-1
cl-quota --user-id=958 --hard-limit=20000 --soft-limit=0 --force
- Specifying limits for a package:
cl-quota --package pack1 --hard-limit=-1 --soft-limit=5000
cl-quota --package pack1 --hard-limit=10000
cl-quota --package pack1 --soft-limit=default
- User diagnostics (with example output):
cl-quota --user-id=500 --check
Quota disabled for user id 500 (home directory /home/cltest1); quotaon: Mountpoint (or device) / not found or has no quota enabled.
- Synchronizing quotas with caching (executed in cron):
cl-quota -YC
cloudlinux-limits
cloudlinux-limits is an alternative to lvectl CLI tool for LVE management. cloudlinux-limits utility allows you to get/set any CloudLinux OS Shared limits.
Usage:
cloudlinux-limits command [options] [options]
Commands
set | set parameters for LVE/username/reseller |
get | get information about LVE/username/reseller |
Options
--json | return data in JSON format |
--lve-id <int> | Display record only for that LVE ID |
--username <str> | Execute command only for that specific user |
--reseller-name <str> | Execute command only for that specific reseller |
--reseller-id <int> | Execute command only for that specific reseller ID |
--all | Execute command for all resellers |
--for-reseller <str> | Use a supplied reseller for get/set data |
--domain <str> | Show data only for that specific domain |
--limits <keys> | Available keys: speed, nproc, pmem, vmem, maxEntryProcs, io, iops, mysql-gov, mysql-cpu, mysql-io, cagefs, inodes |
--human-readable-numbers | Return PMEM and VMEM limits in KBytes, MBytes or GBytes |
--unlimited | Set all limits to unlimited |
--default [limits] | Reset limits to the Package defaults. List of comma-separated limits to reset them to default or all |
--mysql-gov <ignored|watched> | Monitor or ignore by MySQL Governor |
--cagefs <enabled|disabled> | Enable or disable CageFS for a user |
--mysql-restrict <[un]restricted> | Set user restrict status with dbctl (restricted or unrestricted) |
--mysql-unrestrict-all | Unrestrict all restricted users with dbctl |
--speed <str> | Limit CPU usage for LVE |
--pmem <str> | Limit physical memory usage for applications inside LVE |
--vmem <str> | Limit virtual memory for applications inside LVE |
--nproc <str> | Limit number of processes for LVE |
--io <str> | Define IO limits for LVE |
--iops <str> | Limit IO per second for LVE |
--maxEntryProcs <str> | Limit number of entry processes for LVE |
--mysql-cpu <int> | Set MySQL Governor CPU limit (pct) |
--mysql-io <int> | Set MySQL Governor IO limit (read + write MB/s) |
--inodes <N,M> | Set inode limits. N - soft, M - hard |
--save-all-parameters | Save all parameters even if they match with default settings |
-h, --help | Show this help message and exit |
disable-reseller-limits | disable Reseller Limits for a reseller/all resellers |
enable-reseller-limits | enable Reseller Limits for a reseller/all resellers |
cloudlinux-limits allows you to manage limits and states for the next types of users:
- users, created by admin;
- users, created by resellers with reseller limits enabled (see documentation)
- users, created by resellers without reseller limits enabled.
For resellers' users with reseller limits enabled admin should use the --for-reseller option.
Examples
Get limits
- Return data in JSON format
cloudlinux-limits get --json- Get data for the user
user1in JSON format
cloudlinux-limits get --username user1 --json- Get data for the reseller
res1in JSON format
cloudlinux-limits get --reseller-name res1 --json- Get data for the domain
myapp.comin JSON format
cloudlinux-limits get --domain myapp.com --json- Get data about entry processes and virtual memory for LVE for the user
myappin JSON format
cloudlinux-limits get --username myapp --limits=maxEntryProcs,vmem --jsonChange CageFS status
Note
- CageFS should be installed and initialized
--cagefsoption is not compatible with the--reseller-name,--for-reselleroptions
- Enable CageFS for the user
user1.
Note
This example is suitable for any type of user.
cloudlinux-limits set --username user1 --cagefs enable --jsonChange MySQL Governor status
ignored|watched,restricted|unrestrictedNote
- MySQL Governor should be installed; see documentation
--mysql-govand--mysql-restrictoptions are not compatible with the--reseller-name,--for-reselleroptions
Note
These examples are suitable for any type of user.
- Change MySQL Governor status to
ignoredfor the useruser1
cloudlinux-limits set --username user1 --mysql-gov ignored --json- Change MySQL Governor status to
restrictedfor the useruser1
cloudlinux-limits set --username user1 --mysql-restrict restricted --jsonChange limits for a user
Note
- MySQL Governor should be installed to change the
mysql-cpuandmysql-iooptions --inodes,--mysql-cpu, and--mysql-iooptions are not compatible with the--for-resellerand--reseller-nameoptions--usernameoption is suitable for any type of user
- Set
speed,io,nproc,pmem,vmem,iops,inodes,maxEntryProcs,mysql-cpu, andmysql-iolimits for the LVE ID 1000
cloudlinux-limits set --lve-id 1000 --speed 78% --io 8090 --nproc 900 --pmem 300 --vmem 800 --iops 900 --inodes 9090,8989 --maxEntryProcs 90 --mysql-cpu 30 --mysql-io 500 --json- Set
speed,io,nproc,pmem,vmem,iops, andmaxEntryProcslimits for the resellerres1
cloudlinux-limits set --reseller-name res1 --speed 78% --io 8090 --nproc 900 --pmem 300 --vmem 800 --iops 900 --maxEntryProcs 90 --json- MySQL Governor should be installed to change the
Set limits for a
DEFAULTuserNote
A
defaultuser is used to set some preselected limits for just created user\package.- Set limits for the admin's
defaultuser
cloudlinux-limits set --lve-id DEFAULT --speed 78% --io 8090 --nproc 900 --pmem 300 --vmem 800 --iops 900 --inodes 9090,8989 --maxEntryProcs 90 --mysql-cpu 30 --mysql-io 500 --json- Set limits for the reseller's (with reseller limits enabled)
defaultuser
cloudlinux-limits set --lve-id DEFAULT --speed 48% --io 8990 --nproc 900 --pmem 300 --vmem 800 --iops 900 --maxEntryProcs 90 --for-reseller res1 --json- Set limits for the admin's
Reset all limits to default values (package limits) for a user
- Reset all limits to default values for the user
user1
cloudlinux-limits set --username user1 --default all --json- Reset all limits to default values for the reseller's
res1userr1user1
cloudlinux-limits set --username r1user1 --default all --for-reseller res1 --json- Reset all limits to default values for the user
Reset all limits to unlimited values for a user
- Reset all limits to
unlimitedfor the useruser1
cloudlinux-limits set --username user1 --unlimited --json- Reset all limits to
unlimitedfor the reseller'sres1userr1user1
cloudlinux-limits set --username r1user1 --unlimited --for-reseller res1 --json- Reset all limits to
Enable reseller limits
- Enable reseller limits for the reseller
res1
cloudlinux-limits enable-reseller-limits --reseller-name res1 --json- Enable reseller limits for the reseller
Get info about a reseller
- Get info about the reseller
res1
cloudlinux-limits get --reseller-name res1 --json- Get info about the reseller
Change reseller limits
- Change
speedlimit for the resellerres1
cloudlinux-limits set --reseller-name res1 --speed 78% --json- Reset all limits to
unlimitedfor the resellerres1
cloudlinux-limits set --reseller-name res1 --unlimited --json- Reset all limits to
defaultfor the resellerres1
cloudlinux-limits set --reseller-name res1 --default all --json- Change